On the first day of Christmas my true love gave to me a Partridge in a Pear Tree.
This year I am going to make the Twelve Days of Christmas ornaments. So on the first day of Christmas my true love gave to me a Partridge in a Pear Tree.
I sewed some "partridge" looking beads onto a felt pear. These were super easy to make!
Supply List:
green felt
dark green felt
brown felt
pear shaped cookie cutter or template
parrot/partridge beads or buttons
green embroidery thread
sharp scissors
embrodiary needle
cotton balls or stuffing
simple wire ornament hook
Directions:
Download a simple picture of a pear from the internet. My pear is small but if you were to work on this project with children you might want to make larger pears.
Lately I have been cutting felt using freezer paper. I have read about using freezer paper to cut felt and thought that it sounded like a hassle - but it was surprising easy.
So I printed a pear template from the internet. I traced the pear, leaf and stem onto the matte side of the freezer paper.
Then I ironed the shiny side down of the appropriate color of felt. Then cut out the patterns. The patterns can be used 3 or 4 times. The patterns cut out perfectly.
On the front of the pear sew the partridge bead or button.
I bought the partridge beads at Micheal's.
Then sew the front of the pear to the back of the pear - sewing in the leaf and stem. I used the blanket stitch to sew the two sides togather. Before sewing the sides all the way togather add the cotton balls or stuffing. Then finish sewing the pear together.
Using a simple wire ornament hook - thread the hook through a stitch on the back of the ornament.
FYI-a partridge is a medium sized non-migratory game bird with a wide native distribution throughout Europe, Asia and parts of Africa. They do not sit in pear trees.
Showing posts with label fun with felt. Show all posts
Friday, December 1, 2017
Tuesday, November 28, 2017
White Felt Stocking Ornaments
I love sewing little felt projects while I watch television. These little felt stockings were so simple to make.
Supply List:
white felt
stocking pattern or cookie cutter
pencil
sharp scissors
white embroidery thread
embroidery needle
mini white pom poms
white seed beads
large cotton balls
thin white or silver ribbon
Directions:
Using a blue pencil trace the stocking pattern onto the white felt and carefully cut out the stockings with sharp scissors.
The front of the stocking gets the design. The top of the stocking gets an extra piece of felt.
Sew the front and back felt pieces together with white embroidery thread and stuff with a large cotton ball. Sewing in a ribbon loop at the top for hanging on the tree.
I am planning on tying these ornaments on Christmas packages. Let me know if you make this ornament. Merry Christmas!
Monday, November 20, 2017
Felt Holly Pins for Meals on Wheels
I think these came out super cute! They would look fantastic on top of a Christmas package. They would make an easy ugly sweater by pinning them all over a sweater.
Supply List:
red felt
green felt
red embroidery thread
green embroidery thread
pin with latch
needle
scissors
template
Directions:
Cut out the leaves and circles. I used a quarter to trace the the red holly berries. I downloaded a leaf pattern and traced the leaves. Then I cut out the leaves and holly berries. Each pin needs two leaves and three holly berries.
Overlap the green leaves and sew them together at the bottom and sew some random veins on the leaves.
Sew the holly berries onto the end of the leaves. Overlap the berries and sew with a running stitch.
The pins with the latches are often found in the jewelry sections of craft stores.
Lightly sew the pin on with green thread.
Have a Holly Jolly Christmas!
Thursday, November 16, 2017
Seashell Christmas Ornament
I started making Christmas ornaments!
These ornaments were really easy to make. I like to sew them when I watch my favorite television shows.
Supply List:
royal blue felt
turquoise felt
bright green ribbon
white embroidery thread
green embroidery thread
shell beads or buttons
stuffing or cotton balls
scissors
embroidery needle
Directions:
Cut a two-inch piece of turquoise felt. Sew the word sea with white thread. And sew the shell beads below. I found the Seashell beads at Michael's in the strung bead section.
Then sew the turquoise circle onto a 3-inch piece of royal blue felt.
On the back piece of felt - tack the green ribbon onto a royal blue circle.
Sew the back piece and front piece together. Before completely sewing the ornament closed add some cotton balls or stuffing.
Merry Christmas!
Thursday, October 5, 2017
Felt Turkeys For Meals on Wheels
Because i was making 50 of these turkeys for Meals on Wheels I did not follow the tutorial with the pattern that I used. She used a blanket stitch on the feathers and a running stitch is easier and takes a lot less time to execute. Also she used tiny pieces of black felt for the eyeball and I used a black seed bead. However, I think mine came out super cute. I love them - they are so cheerful. They would also make an adorable garland. And would look so cute on top of a See's candy stick or a pencil.
Supply List:
orange felt
yellow felt
brown felt
red felt
white felt
black seed beads
yellow embroidery thread
white embroidery thread
black embroidery thread
red embroidery thread
brown embroidery thread
needles
scisscors
template from www.frogprincepaperie.com
in the finder box type in "tutorial Thanksgiving turkey finger puppets"
Directions:
Cut out all of the pieces you are going to need. I was making 50 of these felt turkeys so I was cutting the felt out for days.
Sew the yellow feather on top of the orange feather with a running stitch and white embroidery thread. Then using yellow thread add a running stitch around the orange feather. Set these aside.
On the front brown piece sew the white felt dot with a black seed bead on top using black thread and a small needle.
Using yellow thread sew the yellow beak over the top of the waddle.
Put a plain brown piece to cover the messy part of the front piece. Using a whip stitch tack both brown pieces to the front of the feathers. Leave the bottom of the brown pieces open, only sew the sides.
Happy Thanksgiving!
Sunday, September 24, 2017
Felt Candy Corn For Meals on Wheels
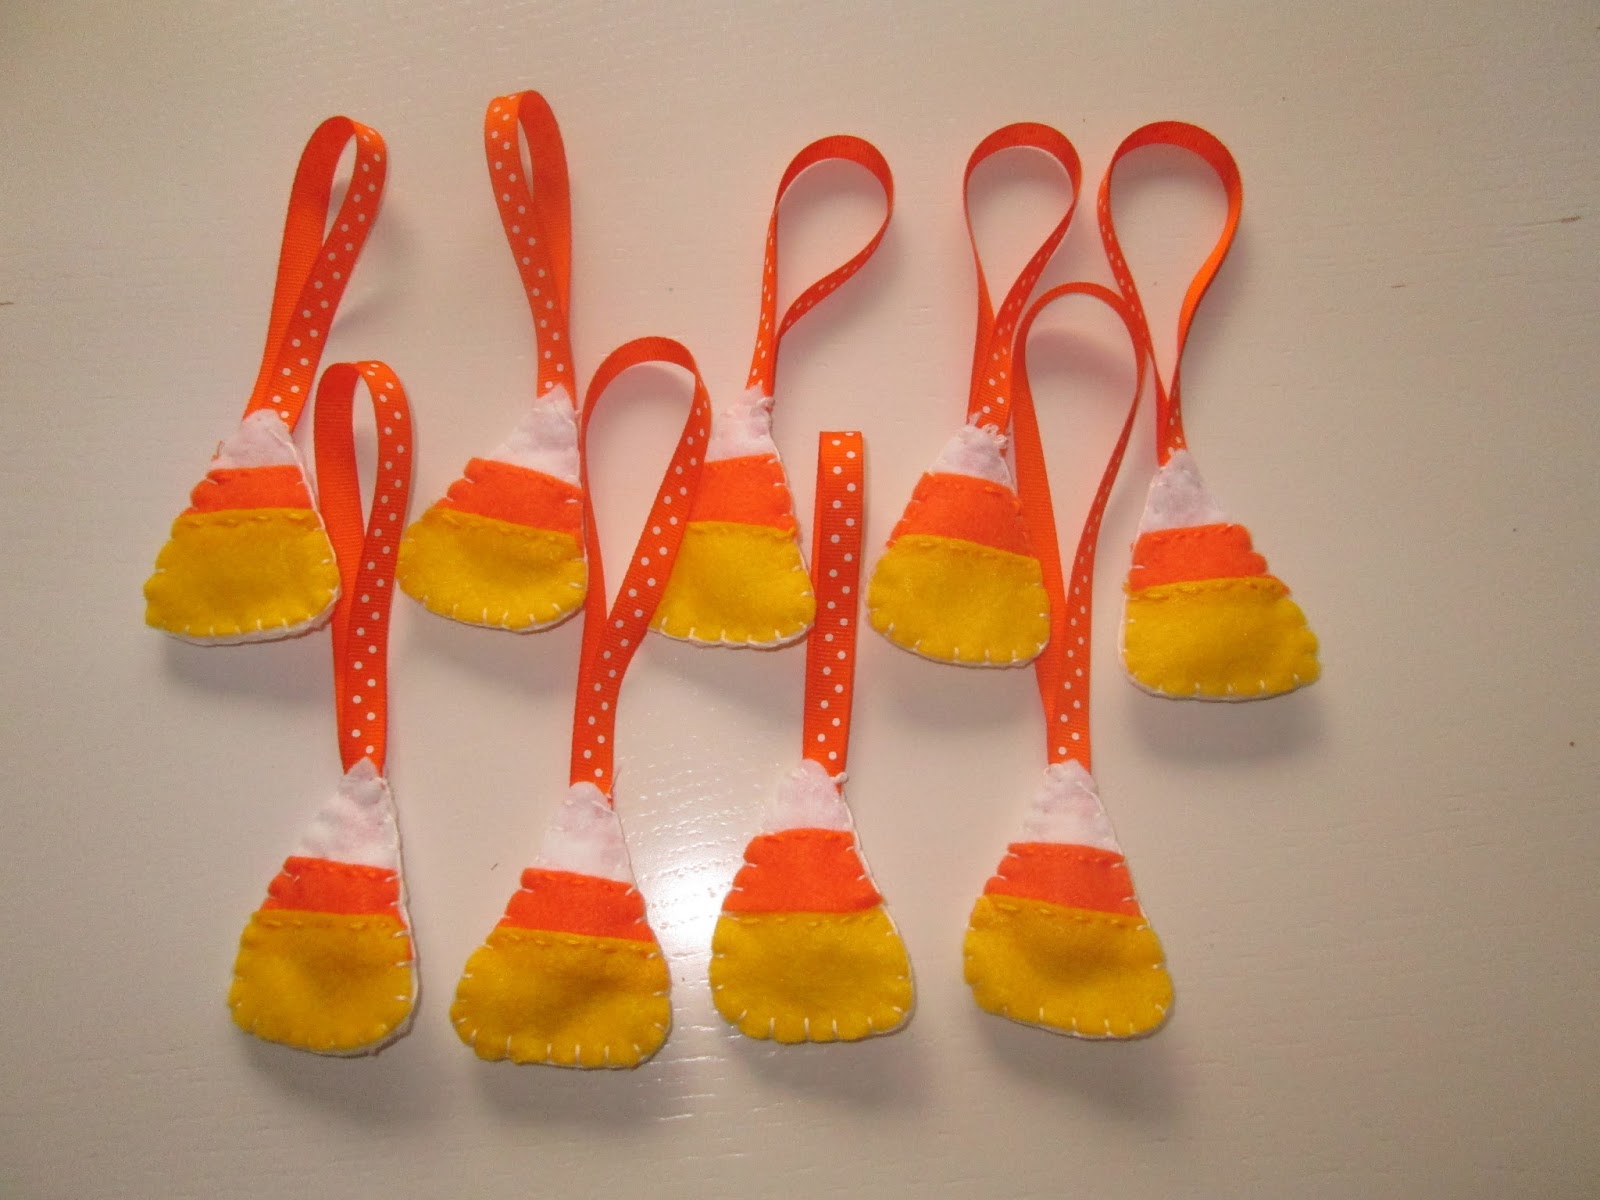
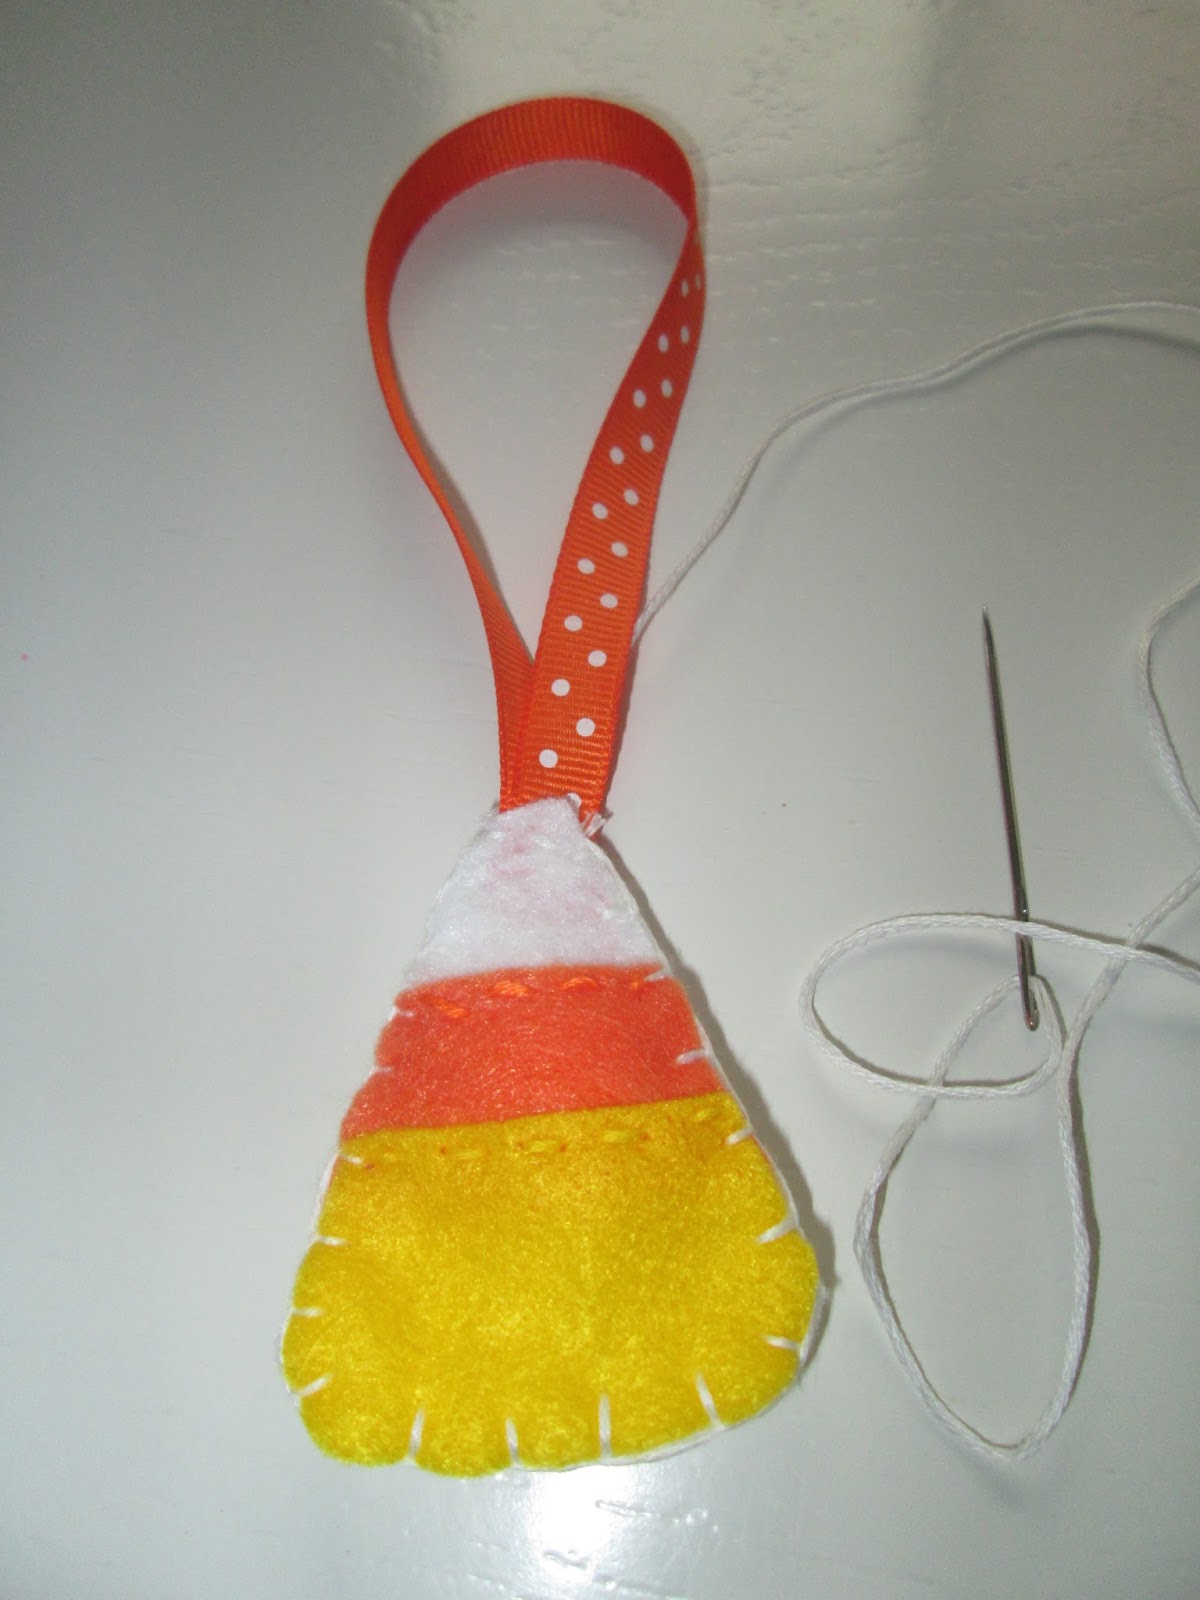
I made 50 of these little felt candy corns for Meals on Wheels. I thinks they would make an awesome banner on a long ribbon or tied onto a gift box for an October birthday gift.
Supply List:
white felt
orange felt
yellow felt
orange thin ribbon
yellow embroidery thread
white embroidery thread
orange embroidery thread
scissors
needle
stuffing or cotton balls
template from www.feltwithlovedesigns.com
Directions:
Cut out all of the pieces using the Halloween template from Felt with Love Designs. She actually sewed a happy face onto her candy corns. Since I was making 50 candy corns I had to delete that step.
Using the orange thread sew the orange piece onto the front piece of the candy corn using a running stitch.
The sides of the orange don't need to be sewn - just the top and bottom.
Sew the yellow piece overlapping the orange piece. Just sew the top of the yellow piece using the yellow thread and a running stitch.
Since I was making 50 of these little candy corns - I worked in batches.
Once the front piece is sewn with both the yellow and orange - you will need a solid pice of white triangle felt, a 8-inch piece of ribbon and a little stuffing or cotton ball.
Sew the front piece to the back piece using white thread and a blanket stitch- before sewing the candy corn shut sew the ribbon into a loop and add a little stuffing or a cotton ball.
I feel so organized that I completed the Meals on Wheels Halloween treat in September!
Thursday, August 10, 2017
You Are My Sunshine - for Meals on Wheels
I made 50 of these little felt suns for Meals on Wheels. I am going to package them with lyrics to "You are my Sunshine."
I have been in vacation mode all summer - so whenever I am home doing vacation laundry I work on this little project. I know that they will love this little gift.
I found the instructions and template on bugsandfishes.blogspot.com.es Unfortunately, because I was making 50 of these I had to delete some of the steps. Laura's at bugs and fishes are so much cuter than mine. I didn't sew the orange pieces to each other and I didn't stuff the yellow sun face before sewing them shut.
This would be a good service project for pre-teen and teenagers to make for a senior center.
Supply List:
yellow felt
orange pen
orange felt
brown pen
black Sharpie pen
yellow embroidery thread
black embroidery thread
needles
black seed beads
small sharp scissors
template from bugsandfishes.blogspot.com.es
glue stick
thin piece of cardboard
Directions:
I used a glue stick to adhere the template to a thin piece of cardboard. Each sunshine needs two round pieces of yellow felt. Trace them with an orange pen.
Each sunshine also needs two pieces of orange felt sun rays. Trace them with a brown pen.
Once the sun rays have been cutout the front is stitched like the above picture with yellow thread.
Using a black Sharpie pen lightly make a face. The front of the sun will get black seed beads sewn onto the black dots and a tight running stitch for the mouth with black thread.
So this is what each sunshine needs and sewn in this order.
Using yellow thread sew the top pieces onto the bottom pieces. This is the front.
This is such a cheerful project! Tomorrow I need to print out 50 copies of the "You are my Sunshine" lyrics and find cellophane bags for packaging. My goal is drop them off at Meals on Wheels by Tuesday!
Saturday, June 3, 2017
Watermelon Bookmarks for Meals on Wheels
I made 50 watermelon bookmarks for Meals on Wheels. It is a summer reading bookmark. This would be an awesome project for any charitable group to make for a retirement home or Meals on Wheels. Hosting a book drive to go along with the bookmarks would be a wonderful idea.
When I was in Junior League we often had book drives for underprivileged children. Book drives are so important. Many children in lower income households don't have access to books and can fall behind in reading. And it is so important for the elderly to keep their minds engaged.
Supply List:
red felt
green felt
black seed beads
tennis can lid
juice bottle lid
black pen
scissors
black embroidery thread
needle
black ribbon
I cut green felt circles with a tennis ball can lid and red circles with a lid from a bottle of orange juice. Just find cookie cutters, jar lids or glasses that you can trace.
Cut the green circles in half.
Cut the red felt in half.
Make sure that the felt pieces look like a proportional watermelon.
Sew the black seed beads onto the felt pieces.
Then sew the red piece onto the green piece with black thread using a running stitch.
Cut the black ribbon into 10-inch pieces.
Sew the ribbon onto the back of the watermelon using a small stitch on the green felt only.
It took along time to make 50 bookmarks. So I made a few extra for me!
Subscribe to:
Posts (Atom)