Friday, March 31, 2017

Wire and Bead Crosses

This is an easy craft for older children to make during this Lenten season. I used beads that I had in my craft cabinet. I wished that I had brown beads - but no such luck.  These crosses would also be nice to include in an Easter basket.


Supply List:

20 gauge wire

24 gauge wire

Colorful beads

Silver spacer beads

Wire cutters

Long nose needle pliers


The wire can be purchased in the bead section of most craft stores. 


Cut a 2" and 3" piece of 20 gauge wire.


Cut a 4" piece of 24 gauge wire and wrap it around the area were the pieces meet to make the cross. Twist the wire around 3 or 4 times. Trim the ends and twist around withe the needle nose pliers.


Start beading with beads and spacers. Cut the wire ends so they are 1/4" long and using the needle nose pliers  twist into a small loop.


Cut a 12" piece of 24 gauge wire. Start winding the wire around the beads top to bottom and side to side. This step really stabilizes the cross.

These can be used to make Christmas ornaments, bookmarks and necklaces. You can make the crosses smaller or larger - whatever you prefer.

I  am planning on using these on a cake or a cupcakes. 


Thursday, March 23, 2017

Selfie Patches


Supplies:

gray felt - two inch circles

hot pink felt - three inch circles

cameo silhouette bead

black marker

sharp scissors

black embroidery thread

embrodiary needle


Write selfie with a black marker and using black embroidery thread sew over the marker and tack the bead in the middle of the circle.


Sew the gray circle onto the hot pink circle with a running stitch. And now you have a patch. I think it would look cute on a wrapped gift or sewn onto a pair of jeans.

Wednesday, March 22, 2017

Hot Cross Buns


Today I made Hot Cross Buns! I have always wanted to make Hot Cross Buns and I must say they turned out awesome and were surprising easy to make. I read so many Hot Cross Bun recipes online and finally settled on the recipe fromwww.jocooks.com and her recipe was easy to follow and I had every ingredient already in my cupboard and refrigerator. Add if I can make homemade Hot Cross Buns - so can you!

Ingredients for Buns:

1 1/2 cups milk, lukewarm

1 tablespoon active dry yeast

1/2 cup sugar

4 cups of flour

1/2 teaspoon salt

1/2 teaspoon nutmeg

2 eggs

4 tablespoons butter (1/2 stick) softened

1 cup raisins

Syrup Glaze:

1/4 cup water

1/4 cup sugar

Cream Cheese Icing:

1/2 cup confectioners sugar

2 tablespoons cream cheese, softened

1 tablespoon butter, softened

1 teaspoon vanilla extract

1/2 tablespoon water

Directions:

In a small bowl combine the lukewarm milk, sugar and yeast. Stir and let it rest for 10 minutes. Once the bubbles start forming you will know that the yeast is activating.

In the bowl of your stand mixer fitted with the dough hook add the 4 cups of flour, salt and nutmeg.

Add the eggs and butter to the activated yeast mixture and stir until combined.

Add the yeast mixture to the flour and mix on medium-low for 5 minutes. Add the raisins and continue to mix for another minute.

The dough should be elastic and not stuck to the side of the bowl.


In a large bowl add a tablespoon of canola oil and use a paper towel to spread the oil all around the bowl.

Add the dough to the bowl rolling the dough around so that it is completely covered with oil.

Cover the bowl with plastic wrap and put it in a warm place in your kitchen and let rise for 2 hours until the dough is almost doubled in size.

Get out a large casserole type pan - I used a 13" x 9" glass pan. Lightly spray the bottom of the pan with a non-stick baking spray.

Divide the dough into 15 equal balls. Roll the balls until they are smooth.


Cover the buns with a clean damp cloth and place in a warm place in your kitchen for 1/2 hour until they are doubled in size.


Preheat the oven to 375 degrees. Once the buns have doubled in size they will be ready for the oven,


Bake the buns in the 375 degree oven for 20 - 25 minutes until they are a light golden brown.


 While the buns are baking the syrup and icing can be prepared.

To make the syrup bring the water and sugar to a boil on low heat. Let the mixture boil for a minute or two until the mixture thickens. Remove from heat and set aside.

To make the icing whisk all of the ingredients together and put the mixture into a zipper topped bag and put it in the refrigerator until it is ready to use.

When the buns come out of the oven brush them with the sugar syrup.


The sugar syrup gives the buns a beautiful shine.  Let the buns cool for 10 minutes.


Remove the icing from refrigerator. Push the icing down to one corner and twist. Snipe off a small piece and start piping the crosses.


A perfect snack with a cup of tea. Easter is one of my favorite holidays and I hope that  everyone has a blessed Easter with family and friends.

Tuesday, March 21, 2017

Tips on Cutting Felt

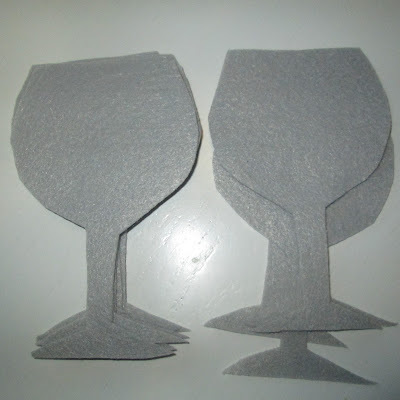
I have read about tips on how to cut felt from various blogs and craft websites. I thought it seemed  like a lot of work and I just wanted to trace a pattern with a marker and cut the felt over the marker lines. But when I made the wine glass ornaments I couldn't get the stem cut perfectly and neatly so I decided to try the cutting tips.

Supplies:

freezer paper

sharp pencil

pattern

felt

iron

ironing board

fabric cutting scissors


Freezer paper can be purchased at most grocery stores and Target.


Place the freezer paper with the shiny side down.  Trace a cookie cutter, cardboard pattern with a sharp pencil. If you have a pattern printed from the internet simply place it underneath the freezer paper it can be easily traced.


Cut the patterns out.


 Decide what color felt to iron the pattern.


Iron the pattern onto the felt with the shiny side face down.


Using your sharpest fabric scissors cut out the patterns. I bought my fabric scissors at Hobby Lobby with a 40% off coupon. The freezer paper stiffens the felt and makes it easy to cut neatly.


Then pull off the freezer paper and you have a perfect piece of felt. So easy- I can't believe that I resisted using this process years ago!

I craft with felt a lot and this procedure has been life changing!


Wednesday, March 8, 2017

Felt Wine Glass Ornament


Red or white? I actually bought some pink sequins and plan on making some more in a few weeks.

Supply List:

Felt in gray, red and cream

Embroidery thread in gray, red and cream

Embroidery needle

5mm silver bugle beads

Clear and red sequins

Cotton balls for stuffing

Thin white or silver ribbon

Scissors

Pattern on Swoodsonsays.com


Cut 2 gray felt glasses for each ornament.  In order to cut felt I trace the pattern onto freezer paper. If you want to use this method - simply google cutting felt and you will get the step by step directions.


Cut red and cream half moon shapes. Cut one for each ornament.


Sew red and cream sequins onto each half moon. I found sewing the sequins oddly relaxing.


On the website where I found this idea - they actually sewed a small seed bead on top of the sequin. I choose to omit this step.


Using a blanket stitch sew the sequin half moon shapes onto the gray felt. And sew the glass with silver bugle beads.


I am a red wine drinker. But I think the white wine ornament is really pretty and understated.


Once the sequin piece is sewn on and the bugle beads sewn around the glass - they can be sewn to the bottom piece.


Tack a ribbon loop to the bottom piece before sewing the two pieces together.


Before sewing the two pieces shut with a blanket stitch stuff them with stretched out cotton balls.

These would be awesome party favors for a wine tasting party. They would also look nice looped around a bottle of wine that you are bringing as a hostess gift.

A set of six would also be a nice Christmas gift for your wine loving friends.


SaveSave

Wednesday, March 1, 2017

Lucky Penny Shamrocks for Meals on Wheels


This was a really easy project. I bought some glitter shamrocks at Micheal's last week.


Then I simply hot glued a penny onto the front of the glitter shamrock. I put the shamrock lucky pennies into little cellophane bags.


I used these gold-lined labels to write "Happy SaintPatrick's Day - Here is a Lucky Penny."

Have a blessed Ash Wednesday.