Friday, February 27, 2015

Homemade Raspberry Jam


I used to make jam all the time! Lately I have been reading about jam made with just fruit and sugar.  So I decided to try it with Raspberries. Strawberries, blueberries and raspberries were all on sale at Sprouts this week.

So I decided to make the Raspberry Jam and read several different recipes and then created my own recipe.

Ingredients:

8 cups of fresh raspberries

7 cups of sugar

1/2 cup fresh lemon juice

Directions:

I always put my jars, lids, rings, jam funnel, and jam tongs in the dishwasher. My dishwasher has a super sterilizing  function. This dishwasher cycle takes almost two hours - so I don't even start making the jam until the cycle is almost over. You could also boil tour jars, lids and rings in a large pot for 10 minutes. I only had little jars so I went the dishwasher route.

Crush the raspberries with a potato masher. Add them to a large stockpot and bring to a boil. Reduce heat and slowly stir in the sugar and lemon juice. Bring the mixture back to a boil and stir  frequently so that the jam mixture thickens but doesn't burn.  Simmer for 10 to 15 minutes.


Set out the hot jars from the dishwasher or boiling method on a clean dishtowel.


Using your sterilized jam funnel start filling the jars leaving 1/4 inch head space.


Once the jar has been filled add the sterilized lid and ring.


 Then place the jar into a pot of hot boiling water for 10 minutes.


Make sure that the boiling water covers the tops of the jars. After you remove the jars from the boiling water with your jar tongs place the jars on clean dishtowel. When the jar has cooled press the top and hopefully you will hear a pop and that means that the jar has sealed!


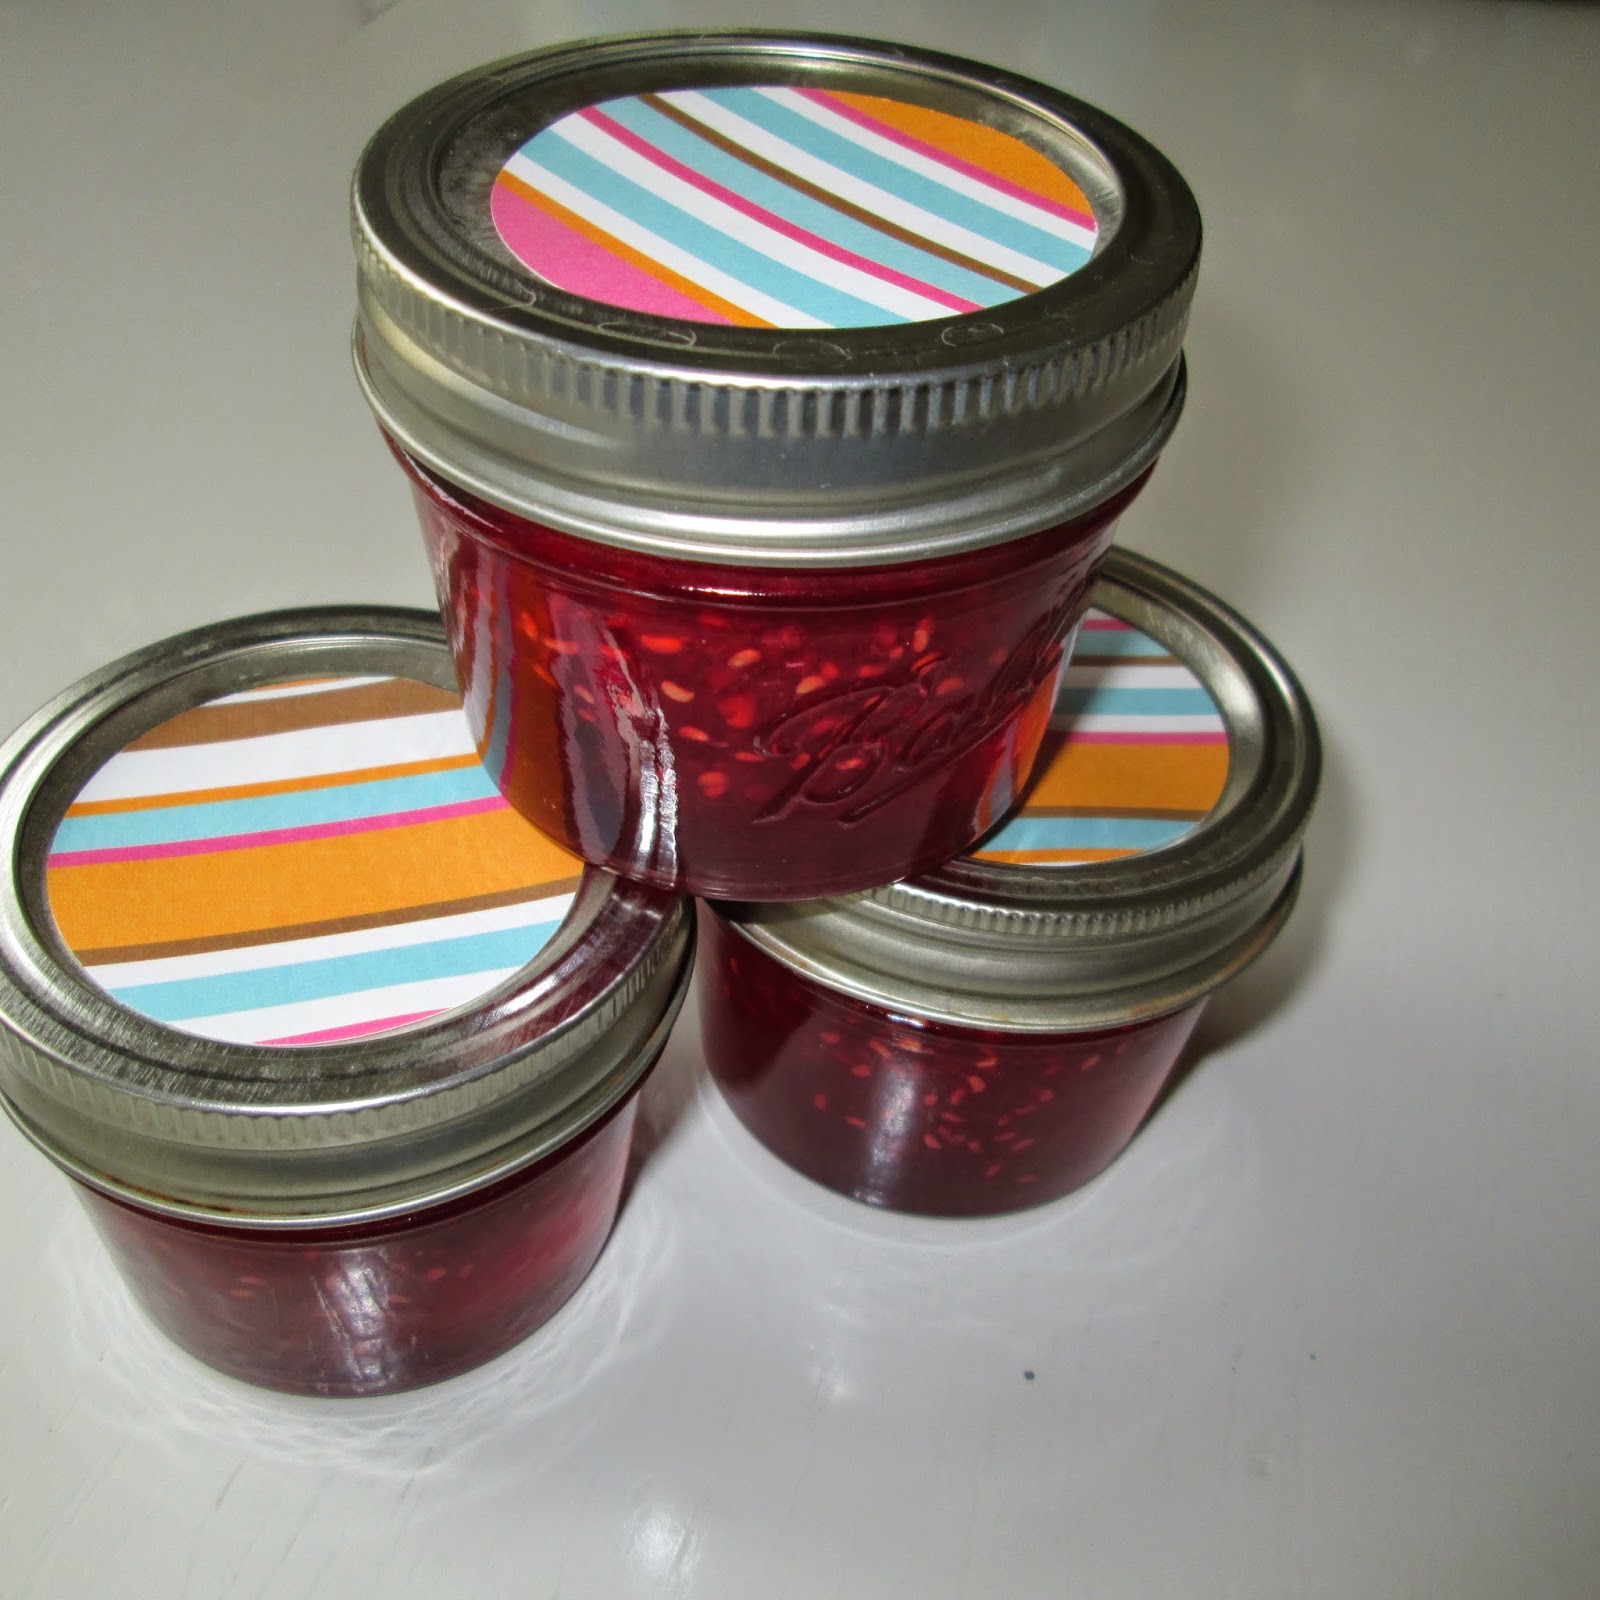
I decorated the tops of the jars with a little piece of striped scrapbook paper and tied two jars together with a thick piece of ribbon. Because I am planning on giving these jam jars to friends and neighbors.


I had this raspberry jam on my toast this morning. It was delicious and I was bummed I forgot to take a picture!


Saturday, February 21, 2015

Living Room - Before and After


Here is the before picture of my living room. I just bought some new lamps, new rug and rearranged some accessories. The before looks so blah! 


I love my new striped lamps! I had the previous lamps from Ballard Designs for at least seven years.


I changed out the rug to a darker color and I think it looks much better.  If you look through the arches my son is in the family room watching TV.


And I rearranged some accessories - it was just a quick little fix. I bought the beautiful white hydrangea at Trader Joe's.   


I always keep the wooden Chinese checkers set on the coffee table. I am always on the lookout for a really nice checkers and backgammon set. And by the way no one ever beats me at checkers.


Hope you like my quick little makeover! 

Monday, February 16, 2015

Cross Lollipops made with Jolly Ranchers


Every time I teach a Religion class right before or during Lent I make the kids these Cross lollipops. I think they look so pretty like a stained glass window. I like to reinforce the image of the Cross.

Supplies:

Jolly Rancher hard candy

Lollipop sticks

Foil

Cellophane bags

Coordinating ribbon

Directions:

Preheat your oven to 275 degrees. Cover your cookie sheets with foil - with the shiny side facing up.


Each lollipop takes 5 Jolly Ranchers. While the oven is preheating start unwrapping  the Jolly Ranchers.


Place three or four Jolly Ranchers in the middle of the foiled lined sheet.


Bake this Jolly Rancher for 1 to 2 minutes - until it is sticky but not melted.


Using the sticky Jolly Ranchers add the additional Jolly Ranchers to make a Cross and bake for 5 to 6 minutes until the Crosses are spread into a Cross shape. Then quickly add the lollipop sticks.


I used some extra long lollipop sticks. Once the Crosses are set and completely hard - gently peel them off of the foil and set them on some parchment paper for an hour or so.


Once the lollipops have dried on the parchment paper for an hour they can be packaged into cellophane bags and tied with a ribbon.

These Crosses could also be used to decorate cupcakes or a cake. In the past kids have really loved these lollipops.


Sunday, February 15, 2015

Handmade Cross Necklaces


I am still substituting for the 5th grade Religion Class. The good news is that I now know everyone's name and I no longer need to use to use the name tags! This week I made everyone a Cross necklace. I used metallic pony beads to make these Crosses.  But pony beads come in all the colors of the rainbow. For a Baptism or First Communion you could use white or pastel colored pony beads


These Crosses can be made into Bible study bookmarks, zipper tags or even a little tie on to party favor bags.

Supplies:

Pony beads

Coordinating beading cord

Glue dots

Scissors

Directions:

Cut your cord into the desired length. I cut mine into thirty inch length because I was making necklaces.


I used black cord but this cord comes in a wide variety of colors - so if you were using pastel beads a white or cream cord would look perfect.


You will need these little glue dots to hold the Cross shape together. They are clear so they really don't show on the finished project.


First layout six beads in a Cross shape. I chose to use a mixed color palette but these would also look really pretty in all one color.


Place the first bead in the middle of the cord.


The second bead is threaded through both sides of the cord.


Using the glue dots fill the holes of the middle bead with glue dots and adhere the side beads.


Thread each side onto the cord. 


Thread the last bead through both pieces of cord and tie the top bead with a knot.


 These would also make cute key chains.


Since I made necklaces I tied a knot at the top of the cord.


I had a lot of fun making these necklaces - I made them because I am teaching the class on Ash Wednesday which is the first day of Lent. This year I will be giving up all sweets for Lent.


Monday, February 9, 2015

Valentine Treats for Religion Class


Lately I have been substituting for a 5th grade Religion class. The 5th graders are so smart and such good readers.

The administrator told me that the regular teacher would probably be coming back so the the next time I will be called to substitute it might be a lower level class.

I decided to make them little a Valentine treat. I bought little heart boxes of candy from Target.


On each tag I wrote "Love the Lord with all your Heart."


I just used different colors of pink and red scrapbook paper to staple over the top of each cellophane bag.


The kids really loved this Valentine treat.