Friday, August 29, 2014

Tennis Ball Sachets - Good Luck Treats for My Tennis Team


I made some tennis ball sachets. These will be good luck treats for my tennis team - our first matches are in two weeks. They can be put in tennis bags, linen cabinets, lingerie drawers or a suitcase. Basically they can be put anywhere that you want to smell pretty and fresh.

Supplies:

Yellow felt

Round cookie cutter

Black pen

White embroidery thread 

Embroidery needle

Scissors

Dried lavender

Cellophane bags

Coordinating ribbon

Tennis ball sticker

Directions:

Using your circle cookie cutter or a round glass - trace circles onto the yellow felt.


Carefully cut out the circles. You will need two circles for each sachet.


On half of the felt circles stitch the white lines of a tennis ball. These will be the top of the sachet.


Now stitch the top circle with the white tennis lines to the bottom blank piece of felt.


Before the tennis ball is sewn shut — add some dried lavender and continue sewing the tennis ball shut.


You should be able to buy dried lavender at any craft store or online.


Once all of the tennis balls are filled with dried lavender and sewn shut - it is time to package them!


I thought I had some yellow ribbon in my ribbon drawer. But I could not find any yellow ribbon. So I decided to use black ribbon. It makes a nice contrast with the yellow tennis ball.


I actually found some yellow tennis ball stickers while I was looking for ribbon. So I put the tennis ball sticker on an index card and cut around it and using double stick tape I adhered the sticker to the middle of the bow.

These can be made for any sport! I made these while I was watching the US Open. I am hoping that my favorites win - Roger and Maria.


Saturday, August 16, 2014

Key Lime Pie


Today I made a Key Lime Pie - it is one of my husbands favorite desserts. He always wants to order Key Lime Pie for dessert in restaurants. It is really very simple to make and this recipe called for lime zest which added a little extra lime flavor. I also did not process my graham crackers in the food processor because I detest cleaning out my food processor. So instead I put the graham crackers in a large zipper top bag and used a rolling pin over them repeatedly until they were almost fine crumbs. I think my crust has a thicker rustic look.

I found this recipe on The Moveable Feasts and it is a really fascinating blog.

Ingredients:

4 teaspoons grated lemon zest

1/2 cup fresh squeezed lime juice

4 large egg yolks

1 can (14 ounces) sweetened condensed milk

11 graham crackers, processed to fine crumbs ( 1 1/4 cup)

3 tablespoons sugar

5 tablespoons unsalted butter, melted

Directions:

For the filling whisk the zest and yolks in a medium bowl for about 2 minutes until the mixture is tinted light green. Whisk in the sweetened condensed milk and then the lime juice. I used a combination of regular and key limes to make the lime juice. Key limes are so small that it would take forever to make 1/2 cup of juice.  Set the mixture aside to thicken at room temperature.


For the crust preheat the oven to 325 degrees. Mix the graham cracker crumbs and sugar in a medium bowl. Add the melted butter. Stir until the mixture is blended.Press the crumb mixture into a 9-inch pie pan. Pressing the mixture to the bottom and sides of the pan to form an even layer. Bake the crust for 15 minutes and transfer to a wire rack to cool for about 20 minutes.

Preheat the oven to 325 degrees and add the filling on to the cooled crust and bake for 15 - 17 minutes. The center should be set but yet wiggly when jiggled. Return the pie to the wire rack so that it cools to room temperature.


Once the pie is cooled it should be refrigerated for at least 3 hours. Serve with lime slices and dollops of whipped cream.


I used the key limes to make the slices to decorate the pie.


Key Lime Pie is really a perfect summertime dessert. It is both sweet and tart, cool and refreshing.

Monday, August 11, 2014

Peach Cobbler Bars


I saw the Peach Cobbler Bar picture on foodgawker and it lead me to the blog From Calculus to Cupcakes. And I found the recipe really easy and happened to have all the ingredients in my kitchen.

Ingredients:

2 sticks unsalted butter, melted

2 cups flour

1 cup oats

1 cup sugar

4 large peaches, peeled and chopped into small pieces

1/4 cup sugar

1/3 cup cornstarch

Directions:

Preheat the oven to 350 degrees. Line an 8" x 8" square baking pan with foil. Brush the foil with a little of the melted butter.

In a medium mixing bowl stir together the flour, oats and 1 cup of sugar. Pour the melted butter over the dry ingredients and mix with a fork until the mixture resembles a coarse meal texture.

Press approximately 1/2 of the oat mixture into the bottom of the prepared pan.

Stir the peaches with the cornstarch and sugar. Spread the peach mixture evenly on top of the  pressed crust. Sprinkle the remaining oat mixture over the top of the peaches.

Bake for approximately 50 minutes or until the top is golden brown.


Let the Peach Cobbler Bars cool for at least 1/2 hour. Then carefully cut the bars into 12 even pieces.


Can you see the juicy layer of peaches?


I have served these bars with both vanilla ice cream and whipped cream.

Wednesday, August 6, 2014

Another Back-to-School Treat Bookmarks for Meals on Wheels


I made some cute and quick bookmarks for an additional September treat. These would also be a fun book club treat or a homemade treat to add to a book gift.


I simply purchased some pre-made bookmark tags at Michael's. These also come in white.


On each tag I wrote Bookmark/Hall Pass and tied a little coordinating ribbon.


I found this cute polka dot ribbon at Michael's. I think the polka dots add a fun element.


Along with the pencil treats - these will be a fun little September treat for Meals on Wheels.


Saturday, August 2, 2014

Peach Blueberry Muffins


Once again blueberries were on sale this week! And I love the smell of fresh peaches - I can't stop buying peaches. They are a lovely Jo Malone perfume for the kitchen. So while I was looking up some recipes online I came across this fantastic recipe for Peach Blueberry Muffins and I just knew that I had to make them! This recipe called for a jumbo muffin tin. I felt like I might have an extra large muffin tin in my baking pan area. And guess what - I did have a jumbo muffin tin! So no trip to Williams Sonoma needed.

I found this recipe on spoonfulofflavor.com and the photos of the muffins were so amazing that I had to make her recipe!

Ingredients:

For Crumb Topping

1/3 cup brown sugar

1 tablespoon sugar

1 teaspoon cinnamon

1/4 cup melted butter

2/3 cup flour

For the Muffins

1/2 cup butter, softened to room temperature

1/2 cup brown sugar

1/4 cup sugar

2 eggs, room temperature

1/2 cup vanilla yogurt

2 teaspoons vanilla

1 3/4 cups flour

1 teaspoon baking soda

1 teaspoon baking powder

1/2 teaspoon cinnamon

1/2 teaspoon salt

1/4 cup milk

1 cup peached, chopped

1 cup blueberries

For the Glaze

1 cup confectioners sugar

3 tablespoons milk

1/2 teaspoons vanilla

Directions:

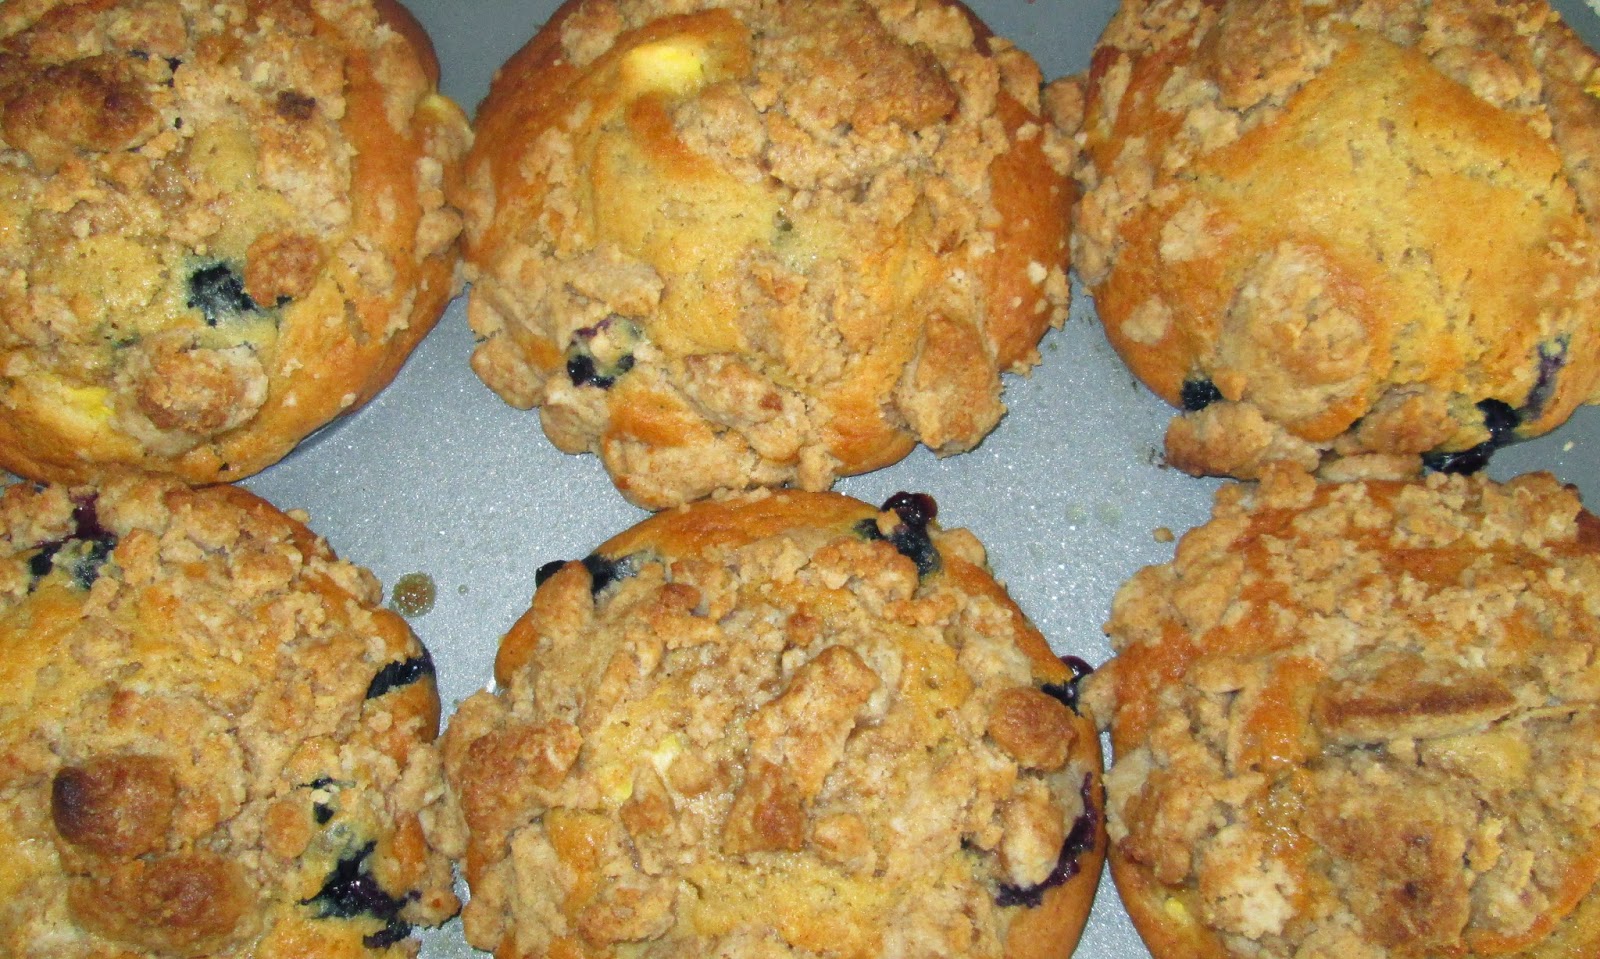
Preheat oven to 425 degrees. Spray a jumbo muffin tin with nonstick cooking spray. Note: my jumbo muffin tin makes just 6 super large muffins which was just perfect for this recipe.

In a medium mixing bowl make the crumb topping combine the sugars, cinnamon and melted butter. Using a rubber spatula stir in the flour until the mixture is combined and crumbly. Set aside.

In the bowl of a stand mixer fitted with the paddle attachment , beat the butter on high speed until smooth. Add brown sugar and sugar and beat on high until fluffy about 2 minutes. Reduce speed to medium and add the eggs, yogurt and vanilla.

In a large bowl combine the flour, baking soda, baking powder, cinnamon and salt. Slowly add the dry ingredients to the wet ingredients and mix until combined. Add the milk and mix until there are no longer any lumps.

Remove bowl from stand mixer and scrape the sides. Slowly fold in the blueberries and peaches.

Divide the batter evenly among the muffin tin, filling them all they way to the top.


Divide the crumb topping among each of the muffins. Crumble the topping with your hands to make some big chunks.


Bake for 5 minutes at 425 degrees then reduce the temperature to 350 degrees and bake for an additional 23 to 25 minutes or until a toothpick inserted in the center comes out clean. Remove from the oven and let cool in the pan for 5 to 10 minutes.


 Slowly run a knife around the top of the muffin and pop them out and let them cool on a wire rack set on top of wax paper. These muffins popped out of the pan perfectly.


Whisk the confectioners sugar, milk and vanilla together to make the glaze. Using a fork drizzle the glaze over the muffins.


I drizzled my glaze while the muffins were still a little warm. The next time I make this recipe I will wait until the muffins are completely cool before adding the glaze.


This muffin is ready for breakfast!


The top of the muffin is sweet and crusty and the inside is moist and chock full of blueberries and peach chunks.

These muffins would be fantastic to serve on a special occasion - or anyway day of the week!

Friday, August 1, 2014

Back-to-School Treats for Meals on Wheels


School supplies are so fun! When my kids were little - I used to host little Back-to-School parties and give everyone a goodie bag with pencils, glue sticks, crayons. So when I was thinking what should I make for Meals on Wheels in September? There is no "real" holiday to celebrate in September - but I could do some sort of Back-to-School fun treat.


I saw these pencils at Target. And knew that I could do something cute with them. P.S. It took a long time to sharpen over 100 pencils!


Michael's had a 20% off everything this week - even clearance items. So I picked up these stickers on super sale!


Using "pretzel" bags that you can pick up at any craft or party store - I added two pencils to each bag and made a little tag with my A+ sticker and stapled it on top of the pretzel bag. And this will be the September Meals on Wheels treat.

On the little tag I wrote "You have the write stuff to get an A+

These little pencil bags would be fun for your kids to make for friends/classmates. And if you aren't making 50 bags - you could add extra pencils to the bag. This would also be cute with colored pencils.