Showing posts with label 4th of July. Show all posts

Tuesday, July 4, 2017

Red, White and Blue Pretzels


I made red, white and blue pretzel snacks for the fireworks shows tonight. The salty and sweet combination is a perfect treat after a barbecue.

Ingredients:

bag of pretzel rods

bag of white chocolate tabs

bag of red chocolate tabs

bag of blue chocolate tabs

white sprinkles 

pretzel bags

red and blue ribbon

parchment paper

Directions:

Lay the pretzel rods out on parchment paper. Remove the broken pieces.


Melt the whole bag of white chocolate tabs and put the melted chocolate into a tall glass.


Twist and turn the pretzel rod around the glass and lay it on the parchment paper to set.


Melt about 3/4 of the bag of blue chocolate. Dip the top end into the blue melted chocolate. Add the white sprinkles while the blue chocolate is still wet. Wait for the blue chocolate to set.


Melt a small handful of the red tabs and but the melted tabs into a zipper top bag. Twist the red melted chocolate onto one end and snip a small hole with scissors. Make some stripes.


Once every pretzel is completely dry they can be packaged into some pretzel bags and tied with ribbon.


Have a safe and wonderful 4th of July! Happy birthday America!

Sunday, June 25, 2017

July 4th Decorations for Meals on Wheels


I made 50 of these little decorations for Meals on Wheels. They were actually fun to make and look so cheerful. I had everything I needed to make these fun ornaments in my craft cabinet. This project would look awesome made into a banner type project.

Supply List:

red, white and blue fabric 

red, white and blue felt

red, white and blue embroidery thread

red, white and blue buttons or beads

red, white and blue narrow ribbon

round cookie cutter

star cookie cutters

black pen

sharp fabric scissors

cotton batting, cotton balls


Directions:

Using the black pen trace two circles for each ornament onto a red, white or blue fabric or felt.

Start cutting the circles. The cutting is always my least favorite part of any project. I made 50 ornaments so I had to cut 100 circles.

Using the star cookie cutters trace 1 star for each ornament that you are making.


Sew a star on the front of each ornament with a simple running stitch.


I sewed a button in the middle of each star.


Cut a 6" piece of thin ribbon and sew the back to the front - sewing in the ribbon at the top in a loop. Before sewing the ornament all the way closed add some batting or a few jumbo cotton balls.


These ornaments would look cute on an indoor doorknob or on a bulletin board.


They look so cheerful! Have a wonderful July 4th!


Saturday, July 2, 2016

Red, White and Blue Fruit Tart


Ingredients:

Crust:

3/4 cup powdered sugar

1 1/2 cups flour

3/4 cup butter, room temperature

Filling:

8 ounces cream cheese, room temperature

3/4 cup sugar

1 teaspoon vanilla

Fruit:

raspberries

blueberries

Directions:

Preheat oven to 350 degrees. Combine the crust ingredients until it starts make a dough. Press the dough into a tart pan and bake in the preheated oven for approximately 12 minutes.


Once the tart shell comes out of the oven let it cool for 15 to 20 minutes. Then combine the filling ingredients with a hand mixer or immersion blender. Once the filling is smooth spread it over the the cooled crust.


Starting with the outside start the fruit design. 


Store the fruit tart in the refrigerator. Take the tart out 15 or 20 minutes before serving. 


To serve cut into pizza slice wedges. The fruit tart will last up to 3 days in the refrigerator. Happy 4th of July! And God bless America!

Friday, July 1, 2016

Red, White and Beautiful m&m Flowers


These little flowers are so cute on top of a cupcake or ice cream and they are also sweet little party favors when packagedphane bag.

Supply List:

Red, white and blue m&m's (purchased at Target)


Square shaped pretzels (purchased at Ralph's)


White choclate tabs (purchased at Micheal's)


Paper plates


Directions:

Set 5 or 6 prezels on a paper plate. Ser a white chocolate tab on top of each pretzel.


Microwave for 30 seconds. Then start making the m&m's into a flower design. Try to place all the m's face down.


These m&m's can be made in all different colors! They are so fun and easy to make.


Happy 4th of July! And God Bless America!


Tuesday, June 7, 2016

Red, White and Wow


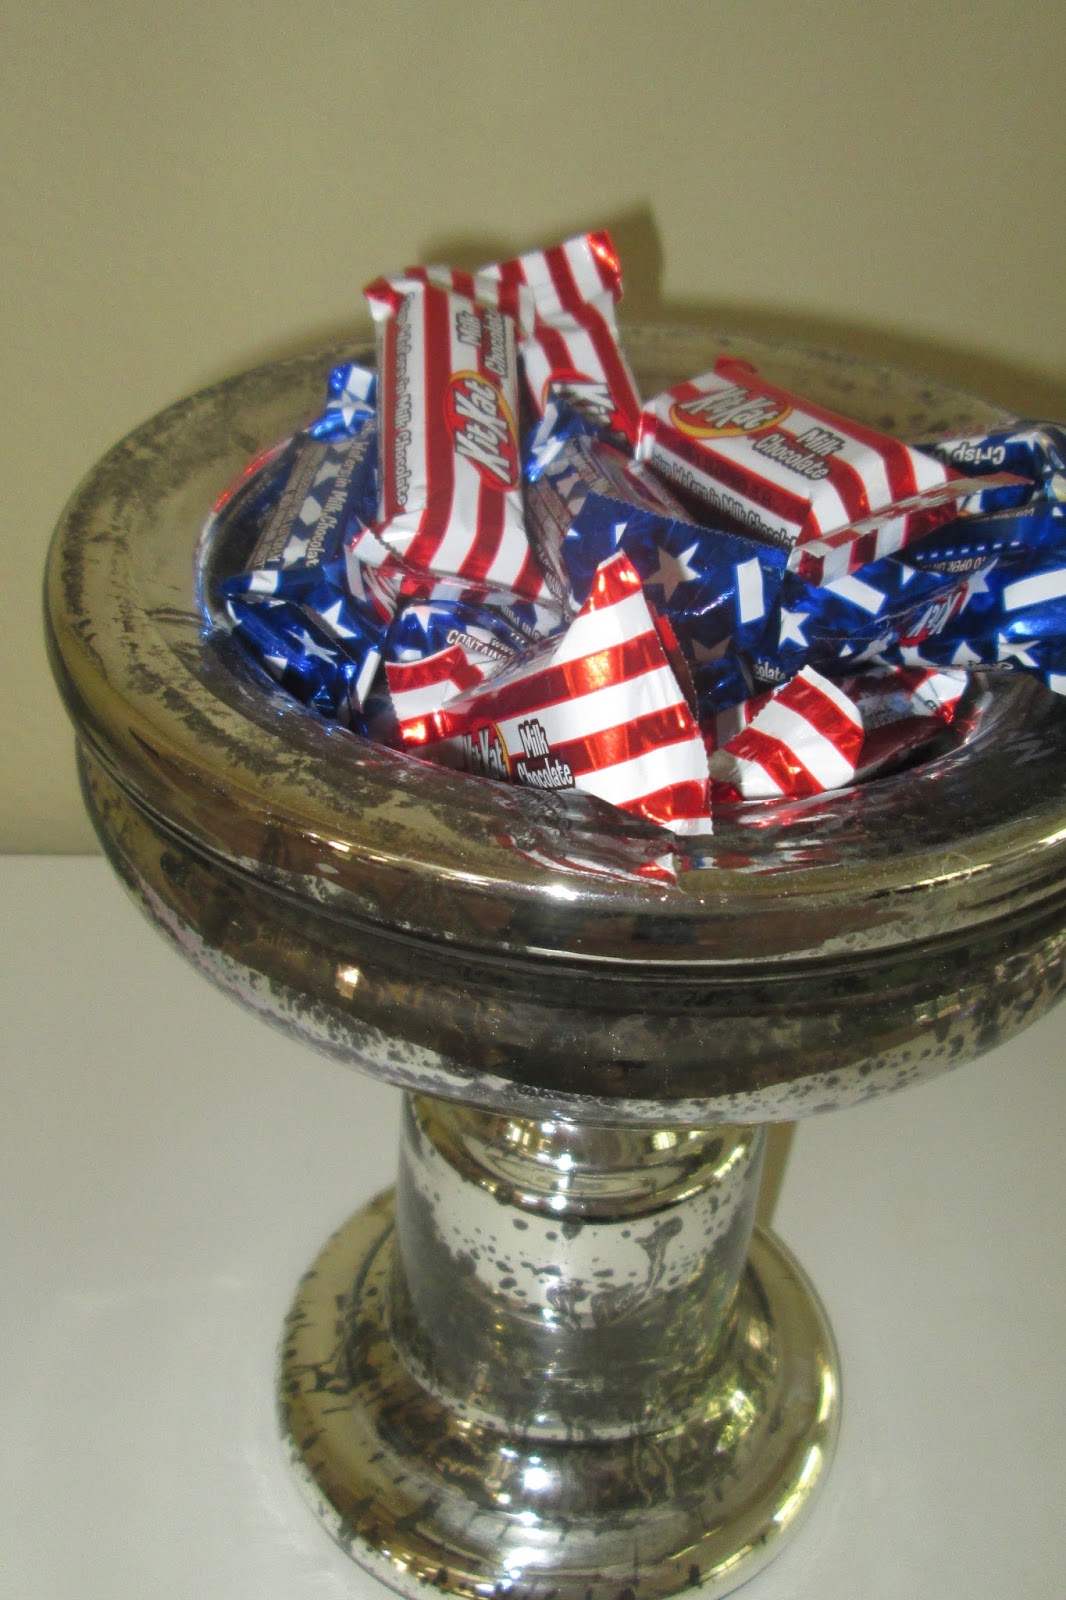
This is my dining room table decorated for Memeorial Day.


Red, white and blue Kit Kat bars in the candy bowl.


Tin cans decorated in red, white and blue scrapbook paper, decorated with ribbon and rhinestones.

Thursday, July 2, 2015

Red, White and Blue Bracelet


I crafted today while I watched Wimbledon, I made these cute little bracelets to celebrate the 4th of July. Each bracelet took about 45 minutes to make.

Supply List:

waxed linen cord

jewelry glue

beads in red, white and blue

large jewelry clasps

scissors

ruler

Directions:

Cut the waxed linen into 9 inch pieces.


The waxed linen cord is in the beading section.


I bought both the waxed linen and jewelry clasps at Michael's. 


Using your jewelry glue - add a glob into the larger end of the clasp and put about 7 to 9 pieces of the waxed linen cord into the clasp.


Wait a few minutes for the glue to dry - then spread the linen out like an octopus and start randomly beading.


The wax will hold the beads in place. I happened to have some red, white and blue beads - left over from when I made the Flag pins for Meals on Wheels. But I also bought some crystal beads in two different shapes at Hobby Lobby.


Once each strand has 15 to 20 beads in any random pattern - cut the wax cord into a 7 or 7 1/2 inch length. Then add a glob of glue to the other side of the clasp and add all of the beaded cords into the glue.


Wait a few minutes for the glue to dry and your bracelet is complete. 

 The waxed linen cord also comes in black and I was thinking with orange and black beads for a Halloween bracelet.

Happy 4th of July! God Bless America.

Monday, June 29, 2015

Flag Brownie


I made a m&m Flag Brownie! So easy and really fun! I simply made a 9" x 13" brownie. I let the brownie cool completely. Then the brownie can be frosted in chocolate or vanilla frosting. I used chocolate frosting.


For this project you will need two bags of red, white and blue m&m's. Apparently Target is the only store selling these red, white and blue m&m's. And when you start the design - place the side with the m&m logo face down into the frosting. Place the decorated brownie into the fridge for about an hour to set the m&m's.


Wishing you a happy and safe 4th of July! God Bless America.


Wednesday, June 3, 2015

Flag Pins for Meals on Wheels


I made 50 of these pins for Meals on Wheels. I ordered the Flag pin kits from OrientalTrading.com.


Each kit came a little plastic bag withe the pins, beads and directions.


Once I made a few Flag pins I no longer needed the directions.


I made the pins while I watched the French Open. I will need to find a new craft project when I watch Wimbledon in 3 weeks!


Now that I know how to make these Flag pins - I am going to buy the supplies at Michael's and make a bunch for friends and neighbors.


Since I was making these for Meals on Wheels - I packaged them in little bags. These little pins are perfect for Memorial day, Flag day and the 4th of July.

Thursday, July 3, 2014

Red, White and Blue Table Setting


I started getting ready for the 4th of July - by getting my table ready for dinner. I used a lot of my Christmas red and white items combined with a few blue items from my kitchen.


I use this platter for Flag Day (also my Dad's Birthday), Memorial Day and of course the 4th of July.


Before you go out and buy specific red, white and blue dishes - see what you have in your kitchen. The polka dot placemats are mostly used at Christmas. The red and white silverware I bought one year to use for Valentine's Day.  So checkout your holiday items and you might be able to make a wonderful table with items from your own home!


Monday, June 30, 2014

Red, White and Blue Fruit Tart


I love making fruit tarts! I make them all summer - each fruit tart looks and tastes different depending on the type of fruit that  you use.

This is a simple recipe and you probably have everything that you need in your cupboard and fridge.

Ingredients:

Crust:

3/4 cup confectioner's sugar

1 1/2 cups flour

3/4 cups butter, room temperature

Filling:

8 ounces cream cheese, room temperature

3/4 cup granulated sugar

1 teaspoon vanilla

Topping:

fresh fruit

blueberries

raspberries

watermelon

Directions:

Preheat the oven to 350 degrees. Combine the confectioner's sugar, flour and butter until it starts to make a dough. Then press the dough into a round tart pan. Bake the crust for 10 to 12 minutes.

While the dough is baking wash and dry your fruit and cut the watermelon stars.


In order to cut the watermelon stars - cut thin slices of watermelon and use a small star shaped cookie cutter to cut out the stars.

Once the crust is baked - make the filling by combining the cream cheese, granulated star and vanilla. I use an immersion blender. Once the filling is creamy spread it all over the tart.

Starting from the outside start adding the fruit.


Keep adding fruit until the entire tart is covered.


I left a lot of the white filling showing because - the theme for this fruit tart was red, white and blue. Place tart in the refrigerator and take it out about 20 minutes before serving.


This tart can be cut into pizza like wedges. Keep this tart in the fridge for up to three days - although I doubt it will last that long.