Monday, December 18, 2017

Baby Jesus Ornament


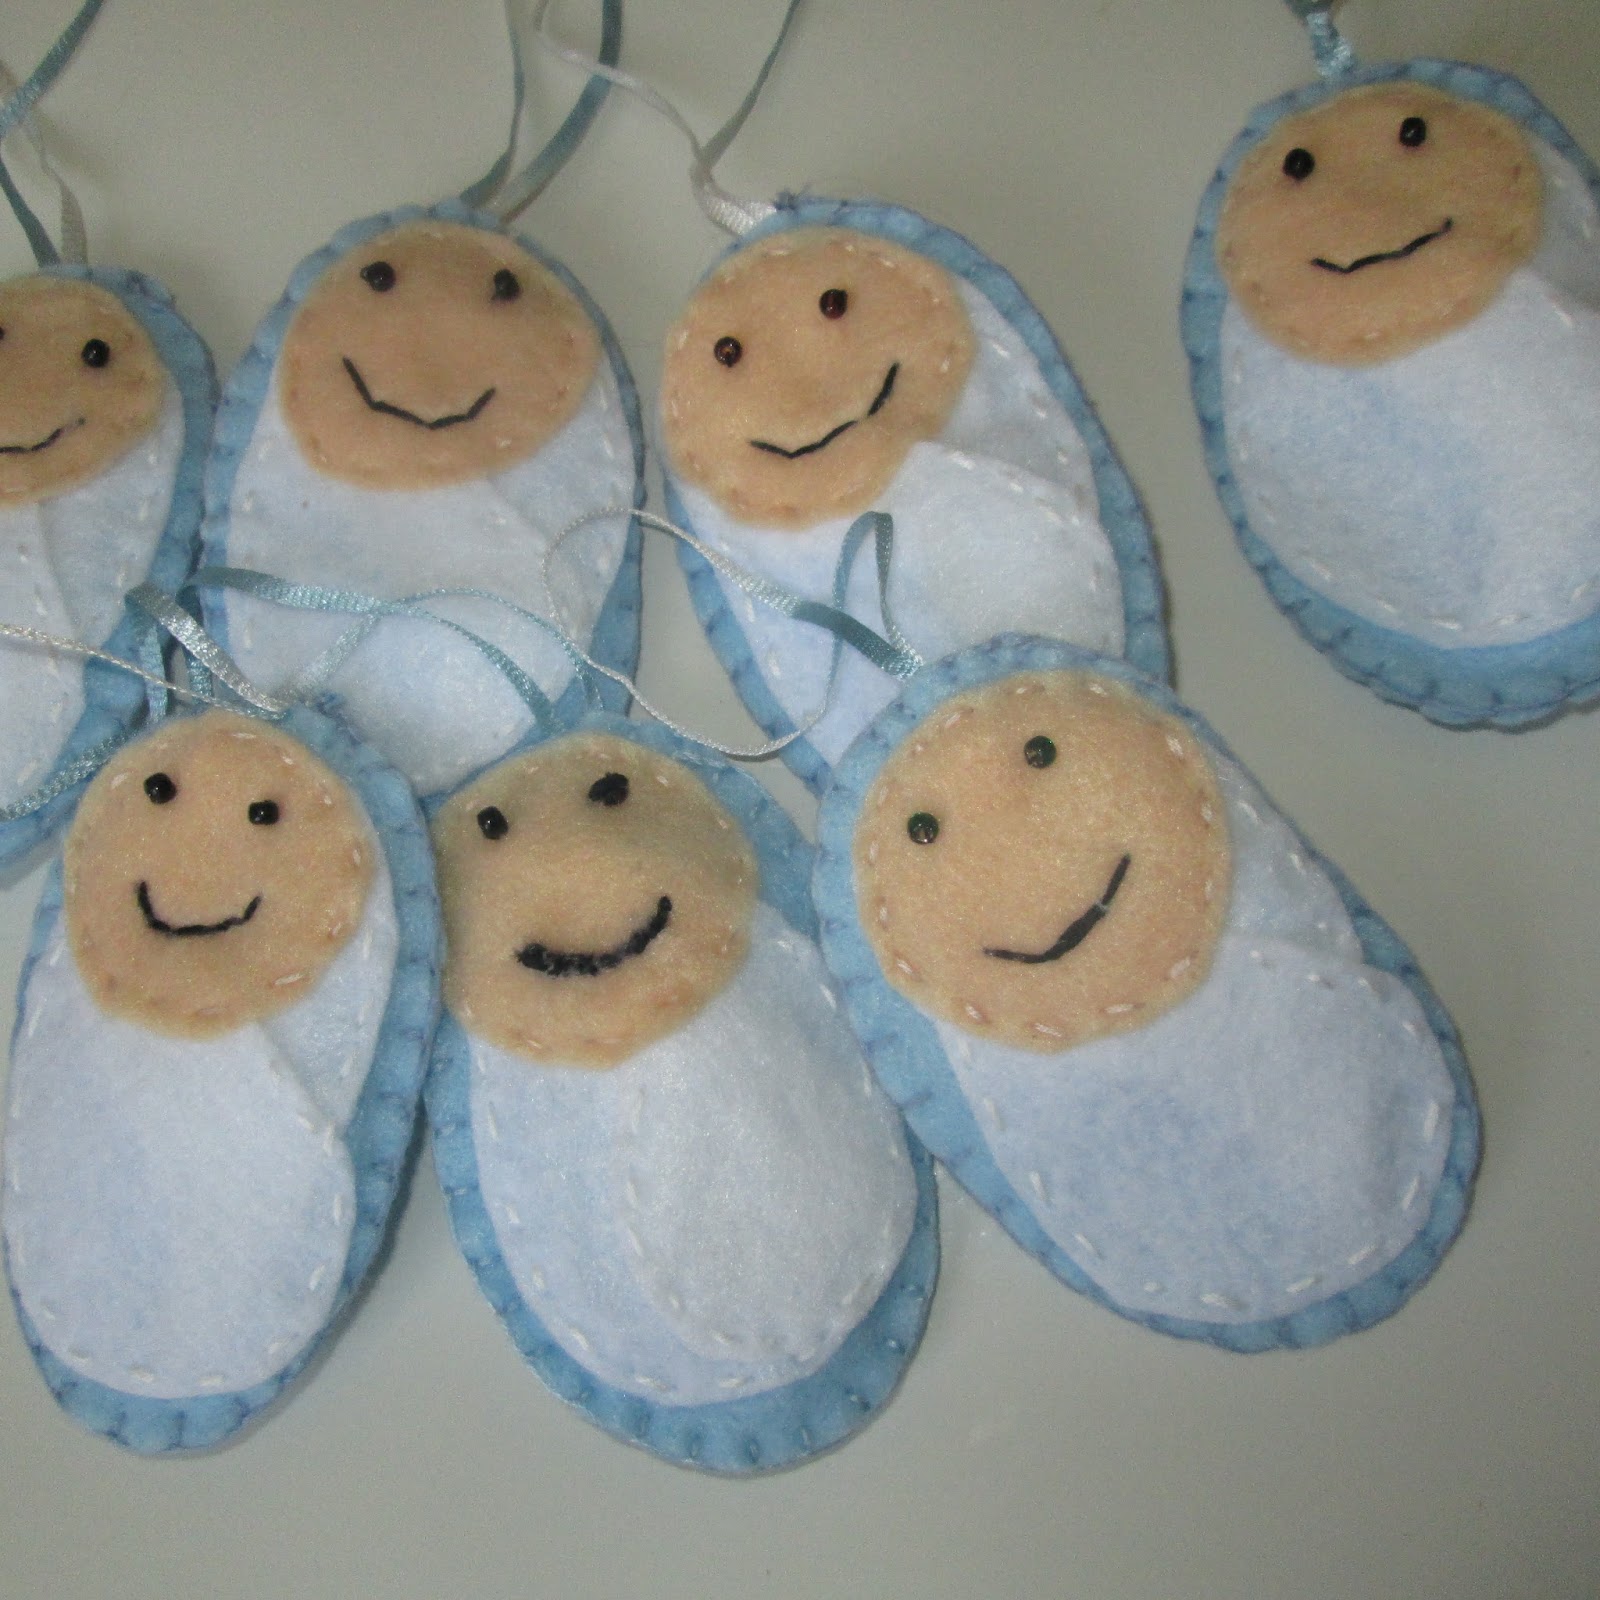
I think my baby Jesus ornaments came out really cute. 


Supplies:

light blue felt

white felt

flesh felt

black seed beads

white embroidery thread

blue embroidery thread

black embroidery thread

flesh embroidery thread

light blue thin ribbon

Tacky glue

needles 

cotton balls or batting

scissors

template from www.itsalwaysautumn.com
When you get on the website type in Baby Jesus ornament in the finder area


Directions:

Cut out all the pieces. Two blue ovals, two white blankets and one head per ornament.


Glue one part of the blanket on the blue felt using the Tacky glue.


Glue the second part of the blanket onto the blue felt.


Tacky glue can be purchased at any craft or fabric store.


Next glue the head onto the top of the blue oval.


Separate a few pieces of the black thread and use a thin needle to sew the black seed beads onto the face.


Using the white thread and a running stitch sew the white felt blanket onto the light blue oval.


Sew the face with a running stitch and two strands of the flesh thread.


On the back piece of the blue felt sew "baby Jesus" in black thread. I always write it with a black marker and sew over it with thread.


Sew the top piece and bottom piece together with a blanket stitch with blue thread.


I decided to add a smile to the face of the ornament with some black thread and a tight running stitch.


Before sewing the ornament shut add a few cotton balls or some batting and sew a little loop for hanging.


Because Jesus is the reason for the season.


Because Jesus is the reason for the Season!

Wednesday, December 13, 2017

Saint Lucy - An Advent Saint


I love how my Saint Lucy turned out! She looks even cuter in person. I am teaching a Religion class on her feast day (December 13th) and I am going to teach the children about Saint Lucia.

Supply List:

lady peg dolls

white paint

yellow paint

flesh tone paint

small paint brushes

fine tip black Sharpie pen

green wire pine or green pipe cleaner

yellow toothpicks

piece of Styrofoam

hot glue and glue gun

thin red ribbon

Directions:

Paint the body in two coats of white paint. Take care and make sure the first coat is dry before painting the second coat.


Paint the head with flesh tone paint.


 Draw eyes and mouth with the black Sharpie. Then paint the hair in yellow.


 The hair style doesn't need to be perfect because a wreath is going to be glued to her head.


Hot glue a thin red ribbon around her waist. Then hot glue a small red bow in the front.


To make the candle I bought a toothpick package with colorful toothpicks. I picked out a bunch of yellow toothpicks. I cut the yellow toothpicks in half. Then put the yellow pointy end in to the Styrofoam. Paint the piece of the toothpick showing with white paint.


Form the evergreen wire into a wreath and hot glue the wreath onto Saint Lucy's head. Then take the toothpick candle and apply a little glue on the end and adhere four toothpicks around the wreath.


I found this wired evergreen/pine at Hobby Lobby.


If you can't find the wired pine in a pinch some green pipe cleaner tinsel like would also look awesome.

There is a lot of legend surrounding Saint Lucy, but one thing is clear she believed in God and declared her beliefs.

She was tortured and killed under Christian persecution.

She is the patron saint of the blind and those with eye trouble.

Saint Lucy pray for us!


Tuesday, December 12, 2017

My True Love Gave to Me 12 Drummers Drumming


On the twelfth day of Christmas my True Love gave to me 12 Drummers Drumming! 


I was struggling with the last few days of Christmas. I had originally thought I was going to sew felt drums. But I wanted to finish the project so I went with the sticker and letters on a wooden rectangle piece of wood.


The first thing I did was paint both sides of wooden rectangles with white paint. And I added a number 12 sticker. I always paint and glue gun on large pieces of cardboard.


I found these music stickers at Hobby Lobby and used them for the drums and pipers.


I glue gunned the letters "drumming" and added the drum stickers.


On the backside of the ornament I glued a red ribbon loop.


I did it - the twelve days of Christmas ornaments! Yeah! Merry Christmas!


Monday, December 11, 2017

My True Love Gave to Me Eleven Pipers Piping


On the 11th day of Christmas my true love gave to me 11 pipers piping. 

Supply List:

rectangle wooden pieces

gray paint

paint brush

number 11 stickers

musical pipe instrument sticker

abc bead letters

black pearl ribbon

glue gun and glue sticks


Directions:

Paint the front and back of the wooden rectangles with gray paint. I painted three coats on each side.


I always use a scrap piece of cardboard to paint my projects.


Add the stickers and glue gun the abc beads to spell "pipers."


I found these music stickers at Hobby Lobby and also used them for the 12 drummers drumming.


On the back of the ornament hot glue some black pearl ribbon to make a little loop.


I always buy the pearl ribbon at Hobby Lobby - whenever it is on sale.


I can't believe I am almost finished with this project! 

Merry Christmas!

Sunday, December 10, 2017

My True Love Gave to Me Ten Lords a Leaping


I could not find any leaping lords! So I made my own version of the Ten Lords a Leaping.

Supply List:

oval wooden pieces

turquoise paint

paint bush

number 10 sticker

abc letters - spelling Lords

hot glue gun and glue sticks

black Sharpie pen

frog stickers

black pearl ribbon

Directions:

Paint the oval wooden piece turquoise on both sides.


Once the paint is dry the number 10 sticker can be applied. And the letters that spell Lords can be hot glued next to the sticker.


Using the black Sharpie pen add some dashes that mimic "leaping" and add the frog sticker at the end of the leaps.


Turn the ornament over and hot glue the black pearl ribbon to form a loop. 


Note: save pieces of cardboard to use to paint and glue on.  The wooden pieces and frog stickers were purchased at Micheals. The abc beads can be purchased at Micheals and Hobby Lobby. The black pearl ribbon is from Hobby Lobby. Remember to use your coupons.


Merry Christmas!


Saturday, December 9, 2017

My True Love Gave to Me Nine Ladies Dancing


This was one of the easiest ornaments that I made - because I am losing steam - it has been a ton of work to figure out the last few ornaments. I have an idea in mind and then I can not find the items that I need.

Supply List:

oval wooden pieces

pink paint

paint brush

ballet sticker

hot pink sharpie pen

pink pearl ribbon

hot glue gun and glue sticks


Directions:


Paint the oval pieces pink on both sides. I painted two coats on both sides. They look like huge bandaids.


I found some cute ballet stickers at Hobby Lobby.


Put a ballet sticker on each pink oval.


I added a number 9 sticker and using a hot pink sharpie I wrote "ladies dancing."


Heat up the hot glue gun and glue a pink pearl ribbon loop on the back. 


I think this ornament came out super cute and it was one of the simplest one that I have made so far!

Friday, December 8, 2017

My True Love Game to Me Eight Maids a Milking


Supply List:

wooden ovals

yellow paint

paint brush

cow buttons or beads

milk bottles

number 8 sticker

abc beads that spell "maids"

black polka dot ribbon

hot glue gun and glue sticks


Paint the ovals with 2 coats of yellow paint on each side.


I bought the oval wooden pieces at Hobby Lobby.


Then I hot glued on a cow button and two milk bottles.


The cow buttons are from Hobby Lobby.


I always hot glue and paint on scrap pieces of cardboard.


Baby bottles can be found in the baby section of a craft or party store.


The last step is to glue the ribbon loop on the back of the ornament.