Showing posts with label Music Treats. Show all posts

Sunday, December 11, 2016

Small Jingle Bell Wreaths - Day 11 of the Twelve Days of Ornaments


This is such a super easy craft that your kids could make them with a little help.


Supply List:

Craft wire

Scissors

Jingle bells

Ribbon

Fancy ornament hooks

Directions:

Cut a 12 to 14-inch piece of wire and twist a very loop at one end.


I think I purchased the craft wire at Hobby Lobby.


Start threading the jingle bells onto the wire and end with another loop.


I used gold and silver jingle bells. But they come in red, green, blue etc.


Take both loops and twist them together. Thread the ribbon through the loop and tie with a bow. Then add a fancy ornament hook. I had the ornament hooks in my craft cabinet. I am not sure where I purchased them.


With extra jingle bells I made little balls.


I also found some red and green bells in my craft cabinet and I think they make a festive ornament.


I also made a wreath out of beads and I think it came out super cute.


I think these will look super cute on the tree. Merry Christmas!

Monday, December 21, 2015

Music Balls - Day 10 of the Twelve Days of Ornaments


I Modge Podged some craft balls with music paper.  I love Christmas music! So I always make a music themed ornament.


Using some music themed scrapbook paper or wrapping paper - cut them into small pieces and narrow strips.


I simply started Modge Podging the little music strips onto these craft balls with a foam brush. I am now officially out of Modge Podge.


While the Modge Podge was drying - I hung them onto a chandlier. 


In the little brown patches - I went back with some Tacky glue and a few extra pieces of music paper. It would also look nice to write the recipients name on the dried ornament with a black Sharpie pen.

My favorite Christmas song is Oh Holy Night.


Saturday, December 5, 2015

How Lovely Are Your Branches


Day 3 of the twelve days of ornaments. Actually I instagramed this late last night - so it really does count for day 3. Even though hopefully later I can post Day 4 and get back on track.

Supply List:

Music themed wrapping paper or scrapbook paper

Popsicle sticks

Glue gun and glue sticks

Scissors

Modge Podge

Foam brush

Silver paper

Star punch

Twine

Directions:

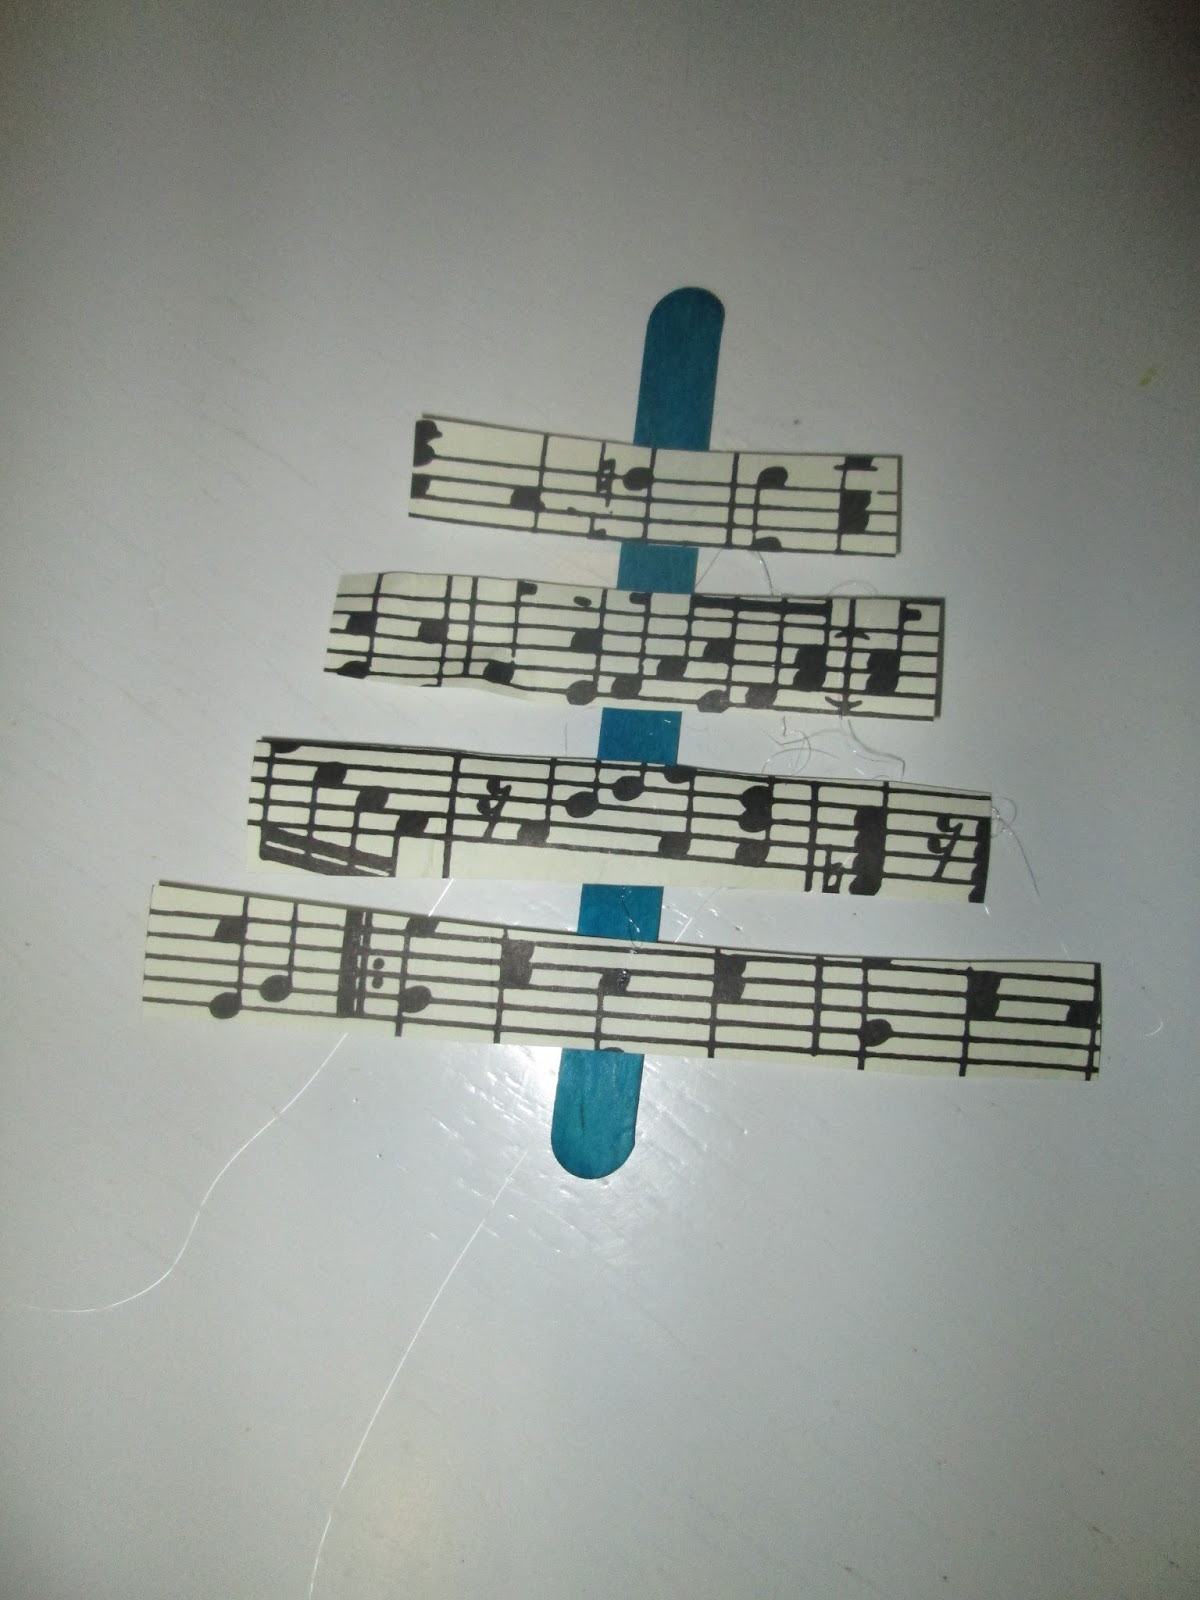
I used a colored popscile stick - but a natural popsicle stick would also look fantastic.

Cut the music paper into small strips and glue onto the popsicle stick.


I started working on a piece of foil. After the music strips have been glued onto the popsicle stick - lightly coat each strip with some Modge Podge.


Once the Modge Podge has dried  - the strips will be stiff and can be cut into a tree shape.


While the Modge Podge is drying - punch out the silver stars. Yellow stars would also look pretty.


Then I glue on the stars at the top of each popsicle stick.


Turn the ornament over and glue a twine loop so that this ornament can hang on the tree or tied onto a package. These would be cute to pass out to choir or orchestra friends.


Monday, December 8, 2014

Handmade Music Themed Christmas Tree Ornaments

I made these Music Themed Christmas Tree Ornaments for Noelle to give to her music and choir friends at church. She sings in the choir at church and we always make a little music themed treat for everyone.


For this project you will need:

Music themed scrapbook or wrapping paper

Green card stock

Christmas Tree cookie cutter

Black pen

Sharp scissors

Modge Podge

Sponge brush

Rhinestone and Pearl stickers

Green 1/8" ribbon 


Trace and cut out some music paper Christmas Trees.


Then cut out some green trees out of card stock.  Using Modge Podge glue both pieces together. Then Modge Podge the front of the ornament with the music paper. Let dry. Then Modge Podge the back of the ornament with the green paper. Let dry. You might want to Modge Podge a few more times to make the ornament nice and stiff. Then decorate the music themed paper with the mini pearls and rhinestones.


Glue a ribbon loop to the back of the ornament. These ornaments were really simple to make - it just took a little time here and there for the Modge Podge to dry.

They would be cute for a piano recital, and any friends who are in orchestra or choir.

Wednesday, December 3, 2014

Felt Bell Christmas Ornaments


To make these felt bells you will need:

felt

bell shaped cookie cutter

black pen

sharp scissors

coordinating embroidery thread

hand sewing needle

cotton filling or sachet filling

jingle bells

thin coordinating ribbon


First trace and cut out the bell shape on the felt, cut out the bell shapes.


On the top piece of felt embroider a snowflake. On the top of the bottom piece sew a ribbon loop. Then sew the top piece to the bottom piece with a running stitch. Before the bell is completely sewn shut fill with cotton fill in or sweet smelling sachet filler. Then at the bottom of the bell sew a jingle bell.


These would make a cute hostess gift or they would be a cute addition to the top of a wrapped package. I like to add Christmas ornaments to my cookie plates that I make for my neighbors.


They say every time a bell rings - an angel gets their wings!

Saturday, October 12, 2013

Music Treat

Tonight my nephew (age 11) is performing with his band and I made him a little music treat.


I wrapped a piece of cardboard with black wrapping paper. Then I wrapped a large Hershey bar and two snack sized Hershey bars in Music wrapping paper. I also put some Guitar Pic money in a little bag.


This is a fun way to give some money and I added a little piece of music wrapping paper to the top.


I always have Hershey bars - but you could wrap any flat type of candy bar or candy box.


I always save my cardboard pieces to up cycle. And I always try to use wrapping paper that I have in my craft cabinet. Reuse, repurpose and recycle!

Wednesday, November 30, 2011

Star Ornaments - Joy to the World! (From Recycled Items)

I have been working on some Star Ornaments for a few days! I made them from items in my craft cabinet. I am going to bring some to our 6th Grade Bible Study class for all the kids and some will go to the Sunday evening Mass choir members (my daughter sings in the choir) and of course her sweet piano teacher will get one!


Don't these look cute? I cut them out of cardboard. These ornaments would make a cute choir or music recital gift tag.


I used my Star cookie cutters to create the above pattern.


Then I used next size cookie cutter to cut out the music wrapping paper.


I used a glue stick to apply the music wrapping paper to the cardboard.


I used red ribbon, black ribbon and twine to decorate the Stars. I used a hot glue gun to apply the bows to the top of the Stars.


The last steps were to add a mini candy cane and a red ribbon loop with a hot glue gun. Then I added "The First Noel" tag with a glue dot.


The "Joy to the World" ornaments have little heart beads and a twine loop! I need to save one of these for my special friend Joy!


The "Oh Holy Night" ornaments have a pink rhinestone and a black ribbon loop! "Oh Holy Night" is my favorite Christmas song. What is your favorite Christmas carol?

I would love it if you left a comment!

Sunday, September 11, 2011

Music Treats

Today is my daughter's last day of singing in the church choir. She has been signing at the Sunday 5 p.m. Mass for the past five years and now she is leaving for college. So to say goodbye - we made little music treats. Since today is 9/11 - I can imagine that mass will be very emotional this evening.


I have done this in a previous post - you just wrap mini Hershey bars - see July 21st post.  So today we wrapped the Hershey bars in music paper.  We also made one to say goodbye to her sweet piano teacher.


These would be a cute treat for anyone in choir, band or for a piano recital.  My son is scheduled to be an Altar boy this evening - so if she has an extra - it will be his!