Showing posts with label St. Patrick's Day. Show all posts

Thursday, March 15, 2018

Saint Patrick's Day Crafts for Religion Class


I painted some Saint Patrick peg dolls for my Religion class.


I looked up some painting ideas on Etsy and Pinterest.


Because Saint Patrick used the three leaf clover to teach the Holy Trinity - I wrapped Three Musketeer bars in green paper and added all different sizes of three leaf clover stickers.

I also had some worksheets and I bought the kids three leaf clover pens to complete the worksheets - but I forgot to take pictures.

Happy Saint Patrick's Day!

Friday, March 2, 2018

Saint Patrick Day Necklaces for Meals on Wheels


Supply List:

small round wooden disks

gold paint

small paint brush

shamrock sticker

Modge Podge

hot glue 

green pony bead

thin green ribbon

Directions:

I bought the wooden disks at Hobby Lobby.


Paint the disks with gold metallic paint on both sides and the edges.


Once the gold paint is dry add a Shamrock sticker to the middle of the disk. And hot glue a green pony bead in the sideways position.


Cover the sticker with Modge Podge.


Once the Modge Podge is dry add a ribbon loop to form a necklace.


These would make a cute school or sports team craft idea. I was excited to finish this project so early!


Wednesday, March 1, 2017

Lucky Penny Shamrocks for Meals on Wheels


This was a really easy project. I bought some glitter shamrocks at Micheal's last week.


Then I simply hot glued a penny onto the front of the glitter shamrock. I put the shamrock lucky pennies into little cellophane bags.


I used these gold-lined labels to write "Happy SaintPatrick's Day - Here is a Lucky Penny."

Have a blessed Ash Wednesday.

Thursday, March 17, 2016

Substitute Teaching 1st Grade Religion Class This Week

This week the class is learning about St. Patrick, Holy week and Easter. Here are some fun things that I made the class this week!


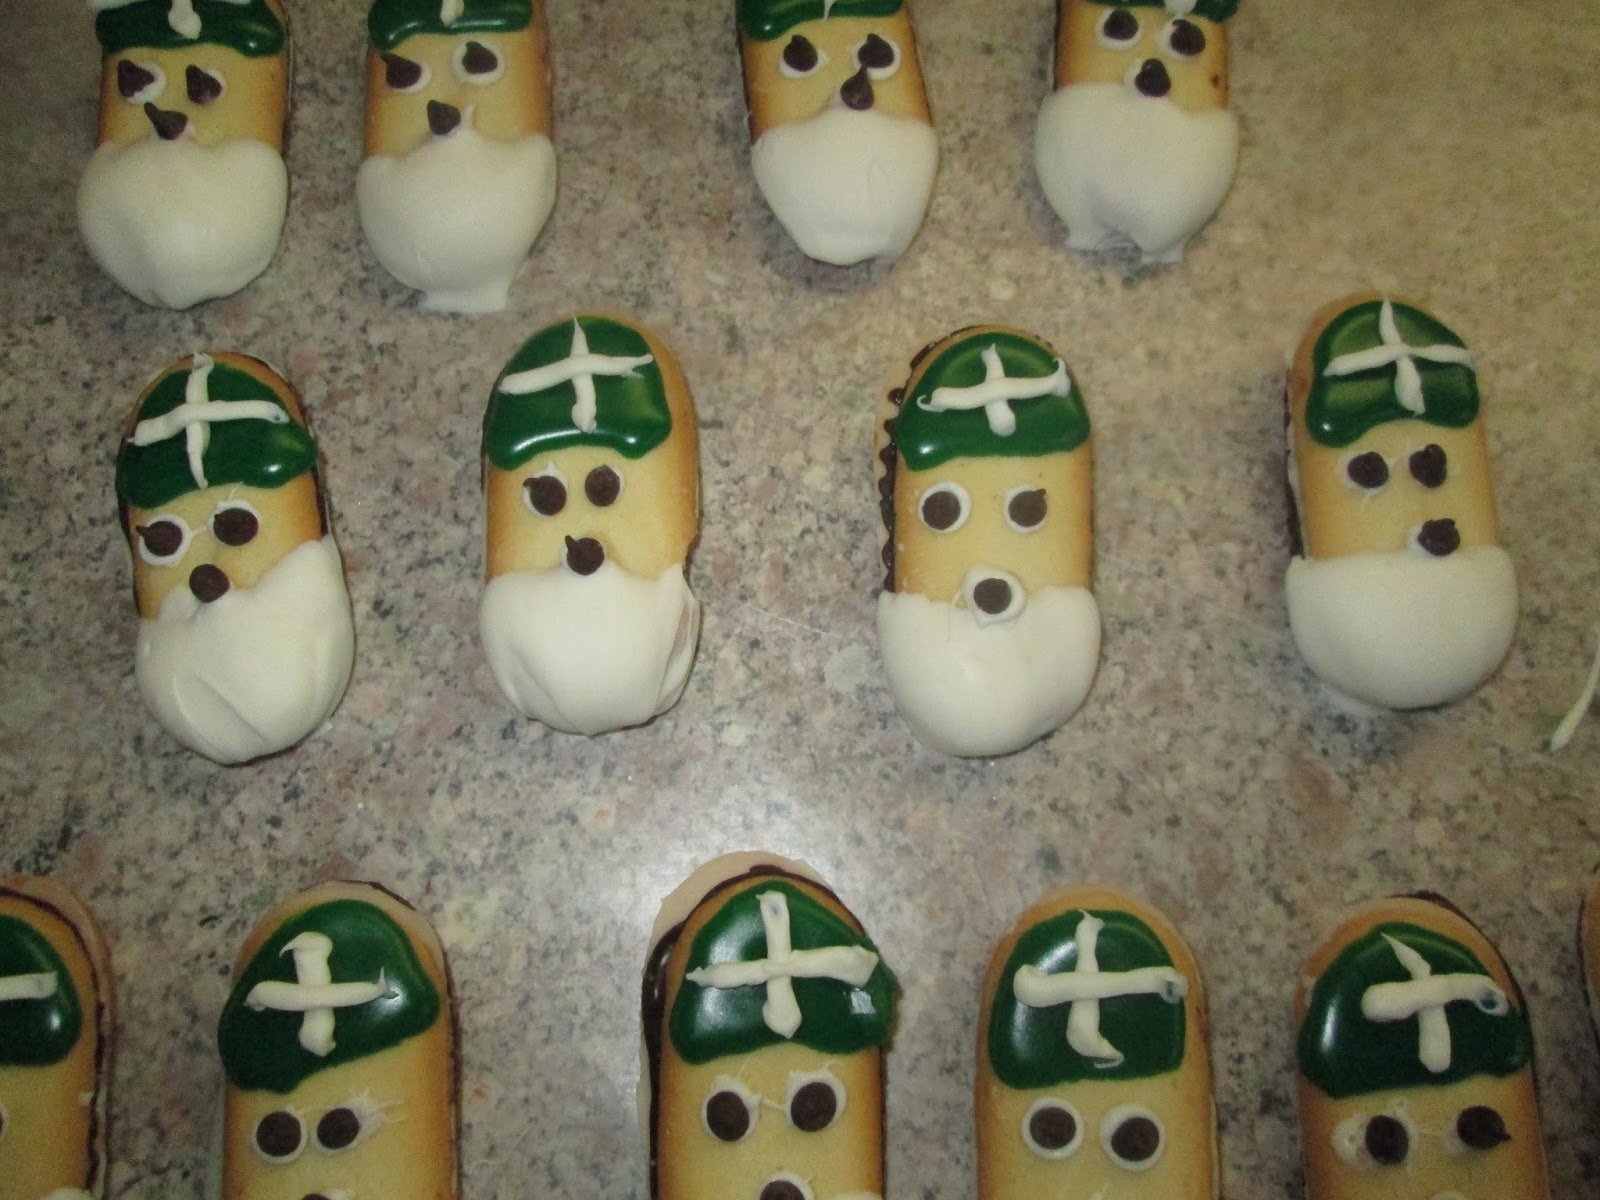
I made these little St. Patrick's day cookies for the class out of Milanos!


I used Mint Milano's. 


Using some white chocolate tinted green dip the top third of the cookie into the green chocolate. I use gel food coloring - it gives a deeper color.


Dip the bottom half of the cookie into some melted white chocolate. Put the rest of the melted chcolate into a zipper top bag and snip off a very small corner and use it to make the white cross on the green hat and add a small drop to adhere mini chocolate chips for the eyes and nose.  Let the cookies completely dry before stacking them.

I also thought it might be fun to add coconut to the white beard. Sadly I was out of coconut.


I made these little Easter treats for the kids to take home. The bracelet is from Hobby Lobby.


I simply added the bracelet and a little Rice Crispy treat into a little bag and tied them with a ribbon.


The kids loved the little take home treat. We did lots of crafts, coloring, reading and activities! I come home so tired! First graders have a lot of energy.


I started preparing for the class - with a bag of Andes Candy, bag of shamrock pipe cleaner pins, tuperware with St. Patrick cookies, coloring sheets, cups for milk and Irish napkins. I set everything up on the dining room table (we usually eat in the kitchen). #prepared


Monday, March 14, 2016

Grasshopper Ice Cream Pie


This is a really easy pie and both Todd and Christian loved it! I could not partake because I gave up sweets for Lent.

Ingredients:

Chocolate graham cracker crust (store bought or homemade)

Mint and chip ice cream (softened)

Cool Whip (softened)

Andes candy

Mint Oreos

Hot fudge sauce

Directions:

Fill the chocolate crust with the softened ice cream - smooth the top.


Next smooth the Cool Whip over the ice cream and decorate with broken Oero's and Andes candy.


Put the pie in the freezer for at least three hours. Set the pie out for a few minutes before cutting the slices.

I found the Mint Oreo's at my local grocery store.


Before serving heat up some hot fuge sauce and drizzle over each slice of pie. Happy Pi day!


Tuesday, March 8, 2016

Preparing to Substitute Teach 3rd Grade Religion


I painted the kids a St. Patrick peg doll. I started painting these on Saturday and finished them this morning.


I am not an artist but I try my best!


I wrapped some Hershey bars in shamrock scrapbokk paper and I always add a sticker with what we have learned in class for the kids to take home.


I found these gold labels in my craft cabinet.


Also I tell the kids they only get the Hershey bar to take home if they pay attention and it works every time! 

I also printed out some pictures of St. Patrick for the kids to color, and everyone gets a shamrock pipecleaner pin. The kids are also going to confession during class time. The Gospel reading that we will focus on is John 8:1-11. 

I also have some gold and white striped napkins, shamrock cookies, and cups for milk. The shamrock pipecleaner pins are in the ziplock bag in the top right corner. #prepared.


Saturday, March 5, 2016

Shamrock Pins


I am making these Shamrock pins because I am substitute teaching 3rd grade Religion class this week.  These Shamrock Pins can be used to teach the Holy Trinity or just for fun to give out on St. Patrick's Day.

Supply List:

green pipe cleaners

green pony beads

scissors

glue gun and glue sticks

small bar pin

Directions:


Put the pony bead in the middle of the pipe cleaner.


Thread the right side of the pipe cleaner back through the pony bead.


Tread the left side of the pipe cleaner through the pony bead.


Thread the long end back through the pony bead to make the third loop.


Cut the stem so that the shamrock is in proportion.


Once all the shamrocks have been made heat up the glue gun.


Glue the bar pin to the back of the Shamrock Pin.


These shamrocks can be made really small to glue on a barrette or headband. They can also be glued onto a long skewer and added to a bouquet. 


The Trinity

Just like the leaves on each shamrock I see there are three parts of the Holy Trinity. First is God the Father, then Jesus his only Son and the Holy Spirit together as one.


Saturday, March 14, 2015

Packaging the Little Leprechauns


I packaged the little leprechauns in cellophane bags with some green Easter grass.


Then I stapled a piece of green scrapbook paper over the cellophane bag and put a sticker on the scrapbook paper.


I hand wrote the labels while I was watching TV.


I packaged over 50 of these little leprechauns. I hope the Meals on Wheels recipients like these little leprechauns.

Friday, March 6, 2015

I am Lucky to Have You in My Class


I substitute teach Religion classes 1st through 5th grade. Lately I have been teaching the same 5th grade every week. I no longer need to use the name tags I know everyone's name and the kids in the class are really smart . This week we were going over the Ten Commandments and Monsignor John came into our class. You could have heard a pin drop! He asked the class some questions and no one raised their hand. It was so embarrassing. However, we got through it! And the kids all got a little treat because they are such a great class! Plus, I get it - no one wants to say the wrong answer in front of Monsignor John.

I simply put some Lucky Charm cereal into cellophane bags and found a free pre made tag that I printed out and stapled the tag to top of the bag. I found the tags on teachingblogaddict and she has many freebie tags that you can print out for your classroom.


Wednesday, March 4, 2015

Little Leprechauns


I made some little leprechauns for Meals on Wheels. I think they came out really cute! They were surprising simple to make. I saw something similar on Pintrest. But they cut out the belts and buckles out of felt. Since I made over 50 of these little leprechauns I improvised by using ribbon and a gold button sticker.

Supply List:

wooden spools

round wooden bead (i used 1" size)

black paint pen

black paint

brown paint

paint brushes

glue gun and glue sticks

green felt

scissors

green embroidery thread

embroidery needle

thin black ribbon

gold adhesive dots

little white pom pom

Directions:


The first step is to paint the bottom of the spool with black paint. 


The paint lines don't have to perfect because they are covered up with green felt.


Using your hot glue gun adhere the round wooden ball to the spool.


Using a black pen add the face and hairline.


This black paint pen is perfect for drawing the eyes, smile and hairline.


Paint the hair with brown paint. Make a patten with paper for the green felt to go around the spool and a to make a little hat.


While the brown and black paint dries - sew up all of the little cone hats. Cut out the felt to go around the spool and cut the black ribbon to size.


Heat up the glue gun - glue the felt around the spool, glue the black ribbon and add the gold adhesive dot. Then glue the little white pom pom to the top of the hat and glue the hat to the head.


I had a lot of fun making these little leprechauns! They look like St. Patrick's Day Elfs on the Shelf.