Wednesday, October 30, 2013

Big Chocolate Chip Cookies Decorated with Candy Corn and m&m's


I found this fun recipe on the baking website Crazy for Crust. I adore this baking blog - it had so many fun ideas.

Ingredients:

1 stick butter, melted

1/4 cup sugar

2/3 cup brown sugar

1 egg

2 teaspoons vanilla 

1/2 teaspoon baking soda

1 1/2 cups flour

1/8 teaspoon salt

2 1/4 cups chocolate chips, divided

1 teaspoon shortening

Directions:

Line a 9 inch round cake pan with foil and use a cooking spray to coat the foil.

Pour the melted butter and both sugars into a stand mixer fit with the paddle attachment. Beat on low until everything is combined. Let the mixture cool for a few minutes.

Mix in the egg and vanilla - mix until combined.

Mix in the dry ingredients - baking soda, flour and salt.  remove the bowl from the mixer once everything is combined and stir in 1 1/4 cup of chocolate chips.

Press the mixture into the prepared pan.


Chill in the refrigerator for 1 to 2 hours.

Tic Tock it has been two hours. Preheat the oven to 350 degrees. Bake the cookie for 20 minutes.


Let the cookie cool for 20 minutes. Remove the cookie from the pan using the foil. Then melt 1 cup of chocolate chips with the teaspoon of shortening.


Spread the melted chocolate over the cookie and decorate with candy corn and m&m's. Let the cookie sit on the counter for an hour. Then chill in the fridge for 1 /2 hour.


Cut the cookie into wedges to serve.


My son and husband loved this cookie! It can be made for any holiday - just by changing the candy colors!

Happy Halloween! I hope that everyone has a fun night!

Wednesday, October 23, 2013

Halloween m&m boxes for the Baseball Team


I talked to my son and his baseball team has a game on October 27th - he said it would be okay if I made some Halloween candy boxes. Although I think I will ask one of the little sisters to pass out the candy boxes. I don't want to be embarrassing.

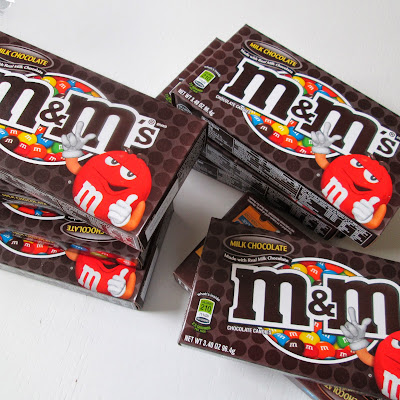
So I bought some m&m movie size candy boxes.


And then I gathered a bunch of orange and black wrapping paper, construction and scrapbook paper and covered all the boxes. I found some skull stickers and went to town. Note: I did this yesterday while my Banana Nut bread was baking.


This could be done for any party - just use your party or team colors.


I think these would make fun treats for any sports team this weekend!

Tuesday, October 22, 2013

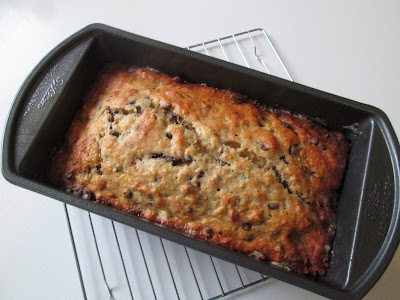
Chocolate Chip Banana Nut Bread with Chocolate Glaze


Lately I have been making a lot of loaf pan type bread. My husband wanted me to make some Banana Nut bread! I found a great recipe for the Chocolate Chip Banana Nut bread on seevanessacraft.com and I decided to add the chocolate glaze. I love a glaze on my baked goods! This was a very easy recipe and I just used a wooden spoon and two mixing bowls. So clean up was very easy!

Ingredients:

3 ripe bananas 

1/2 teaspoon baking soda

1/2 cup brown sugar

1/2 cup sugar

1 1/2 cups flour

pinch of salt

1 egg

2 tablespoons butter

1/4 cup chopped walnuts

1 cup mini chocolate chips

Glaze:

6 ounces of bittersweet chocolate, roughly chopped

2 teaspoons of shortening

Directions:

Butter and lightly flour a 9 x 5 inch loaf pan. Preheat oven to 350 degrees.

Combine dry ingredients - baking soda. sugar, brown sugar, flour and salt.

In a separate bowl mash the bananas and combine with the butter and egg.

Mix dry and wet ingredients together until smooth. Mix in chopped walnuts and mini chocolate chips.

Pour mixture into the loaf pan and bake for 45 minutes or until a toothpick comes out clean. Let the bread cool in the pan for 5 to 10 minutes on a wire rack.


Put the bittersweet chocolate and shortening into a small saucepan and heat on low - stirring frequently until the mixture is smooth and melted. Invert the bread and place it right side up on the wire rack and pour the chocolate over the Banana Bread!


Wait for the chocolate to harden before slicing.


Yum! This bread was fantastic! So easy to make and clean up. My glaze turned out a little too thick - but I took a phone call and that is when is got a little clumpy. Live and learn!

Saturday, October 19, 2013

Halloween Treats for the College Girls


This is a fun and easy project! 

You will need: 

Empty Cardboard tubes (from your toilet paper or paper towels)

A small treat - I used skeleton socks (from the dollar section at Target)

Tissue paper

Ribbon

Tape

Scrapbook Paper

Halloween Sticker


I filled the tubes with these fun Halloween socks!


If you are using paper towel cardboard - cut the tube into thirds.


Stuff the socks into the cardboard tube and wrap the tube with tissue paper, Tape the tissue paper in place and tie the ends with ribbon.


Cut a piece of coordinating scrapbook paper and tape it in place. Add a Halloween sticker!


These can be filled with candy or other trinkets. They would make cute treats for the classroom or sports team.


Thursday, October 17, 2013

Sunflower Seed Tubes for the Baseball Team


My son played baseball from 1st grade until 6th grade. He quit baseball in 7th grade.


My husband was really bummed when he decided to quit baseball. However, now in 8th grade he is back on the field. I guess he just needed a little break. He really seems to be having a lot of fun and once again he is an "Angel."

I love making baseball treats! I made some Sunflower Seed Test Tubes (because I am a Mad Scientist) for the team this week. I saw these Martha Stewart Test Tubes in the Halloween section at Michael's and they were on sale for 60% off!


I also bought some baseball stickers and tiny little baseball Christmas ornaments.


 Once I filled the test tubes (BTW - they are plastic - NOT glass) with sunflower seeds. I added the baseball sticker.


Then I cut the string off of the tiny little baseball ornament and hot glue gunned the baseball to the top of the cork.


You could make these for any sport. They would be fun to make for a tailgating party or a year end treat for the team. The fans in the stands would also love a sunflower seed treat!

I hope your team wins!


Tuesday, October 15, 2013

Bugs and Kisses

This is a really simple project to make - and who doesn't love Hershey Kisses?


For this project you will need:

Hershey Kisses

Plastic spider rings

Pretzel bags or other small sized bags

Orange or black ribbon

Orange or black themed scrapbook paper

toothpicks

The first step is to fill the pretzel bags with Hershey's Kisses and spider rings. Tie the top of the bag with orange or black ribbon.


Once the bags are filled with the Kisses and spider rings - make some tags that say "Bugs and Kisses."


I put my tags on toothpicks and added the spider rings. I just cut the ring part of with a pair of sharp scissors and glued the spider to the tag.


These would be a fun treat for a party favor, the classroom or sports team. They are so easy to make! Have a happy and safe Halloween. Bugs and Kisses to you!

Saturday, October 12, 2013

Music Treat

Tonight my nephew (age 11) is performing with his band and I made him a little music treat.


I wrapped a piece of cardboard with black wrapping paper. Then I wrapped a large Hershey bar and two snack sized Hershey bars in Music wrapping paper. I also put some Guitar Pic money in a little bag.


This is a fun way to give some money and I added a little piece of music wrapping paper to the top.


I always have Hershey bars - but you could wrap any flat type of candy bar or candy box.


I always save my cardboard pieces to up cycle. And I always try to use wrapping paper that I have in my craft cabinet. Reuse, repurpose and recycle!

Wednesday, October 9, 2013

Carmel Apple Bread


I saw this recipe and knowing my love of Carmel Apples - I knew I would be making this! I found recipe on the the domestic rebel- this the second time I have made a recipe from this website. I changed the recipe a little because I am a recipe rebel!

Ingredients:

1 cup of butter, room temperature

1/2 cup sugar

1 teaspoon baking soda

1 tablespoon lemon juice

2 eggs

2 teaspoons vanilla extract

2 cups of flour

1/4 teaspoon salt

2 cups coarsely chopped apples

1/4 cup Caramel  sundae sauce

For Crumb Mixture:

1 teaspoon cinnamon

4 tablespoons flour

4 tablespoons brown sugar

4 tablespoons cold butter

Directions:

Preheat oven to 375 degrees. Spray a 5 x 9" loaf pan with a non-stick baking spray.

In a large bowl cream the butter and sugar together. In a separate bowl dissolve the baking soda into the lemon juice.. The mixture will foam up! Add the foaming mixture, eggs and vanilla to the butter mixture and beat to combine.

Add the flour and salt to the butter mixture and mix until a thick batter forms. Stir in the chopped apples by hand.

Meanwhile in a small bowl combine the crumb ingredients and mix until the mixture forms coarse crumbs.

Add 1/2 of the apple batter to the prepared loaf pan. Drizzle with the carmel sauce and sprinkle with the crumb mixture. Top the crumb mixture with the rest of the apple batter.


Bake for 45 to 50 minutes. Check to make sure that the bread is completely cooked by inserting a toothpick in the middle and making sure that it comes out clean. Cool bread in the pan on a wire rack for a half hour. Then remove from the pan and slice.


The bread can be stored up to 2 days at room temperature tightly wrapped. Yum!


The next time I make this recipe - I am thinking about maybe adding 3/4 cup of golden raisins. I will let you know if do and the outcome. The Fall season is my favorite baking season!

Tuesday, October 8, 2013

Homemade Carmel Apple Lollipops


 Every so often I substitute teach a Religion class. I always like to bring the kids a homemade treat and this week I made Carmel Apple Lollipops. These are so simple to make! And you just need a few simple ingredients that you can pick up at any grocery store or Target.

Ingredients/Supplies:

Two bags of Jolly Rancher Hard Candies

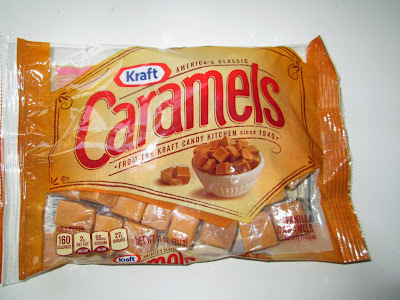
A bag of Caramels

lollipop sticks

medium sized plastic bags, buy the sandwich bags that flap over - not the ziplock type

coordinating ribbon

Directions:

Separate out the green and red Jolly Ranchers - put the rest of the Jolly Ranchers in your bowl for the Trick or Treaters.


Preheat the oven to 275 degrees. Line your baking sheet with parchment paper or a Silpat pad. If you don't have a Silpat pad put it on your birthday or holiday wish list - they make baking and cleaning up super easy. They sell them at Bed Bath and Beyond - use your coupon!

On the Silpat pad line up three green or three red Jolly Ranchers.


Bake in the 275 degree oven for 4 to 5 minutes. They are done when they are melted into the lollipop shape. Take them out of the oven and gently twist in a lollipop stick. Careful - the melted Jolly Ranchers are really hot.


Let them sit for a minute - then using a metal spatula remove them to a piece of parchment paper and make a new batch. I make four lollipops at a time.


Let the lollipops cool. While they are cooling. Unwrap the caramels. It takes a while to unwrap each little caramel.


Melt the caramels in the microwave - about 1 to 2 minutes. Stir the caramels - be careful they are also very hot.

Using a spoon coat the top 2/3 of the lollipop with the melted caramel. Set them back on the parchment paper to dry for a few hours.


Once the caramel is hard - you can put the lollipops into the medium sized plastic bags and tie with a ribbon.


The kids really liked the lollipops! These would be cute to make for a Halloween party, the sports team, classroom or neighbors!


Tuesday, October 1, 2013

Halloween Themed Movie Theatre Candy


I took some Raisinets movie theatre sized boxes - but they make all your favorite candy in movie theatre size. The boxes are easy to wrap.


For this project you will need scrapbook paper, wrapping paper and/or construction paper in orange, black, yellow, red and brown. I happened to have a lot of orange and black. You will also need scotch tape and Halloween stickers.


Check your paper supplies before you start this project - you might have some construction or wrapping paper that would work. Scrapbook paper goes on sale all the time.


Once the box is wrapped with two types of paper - I cut out a large circle and small circle. Tape the two circles together and add your sticker to the middle of the smaller circle.


I am thinking about wrapping a bunch of m&m movie theatre boxes for my son's baseball team. But I need to check with him first - I don't want to be embarrassing.


 I think this is an easy and fun project - for the classroom, sports team, a party favor or neighbor gift. 


Keep checking back - because I have a ton of fun Halloween ideas! News flash - it would be okay to make Halloween boxes of m&m's for Christian's baseball team!