Friday, January 30, 2015

Snowman Pins for Meals on Wheels


I started making these snowman pins for Meals on Wheels during a cold weather week and now it is sunny and warm! These pins are actually taking me a long time to make - so I think after I am finished making 50 pins and packaging them - I might save them for November.

So far I have finished about 15 pins. These could easily be made into Christmas ornaments by sewing a ribbon loop at the top of the snowman between the two pieces of felt. The supply list for this project is simple and older children should be able to help with some of the steps.

Supplies:

White felt

Orange felt

Round cookie cutter

Blue traceable pen

Black, white and orange embroidery  thread

Embroidery needles

Pins

Sharp scissors

Cotton balls

Directions:

Using a round cookie cutter (mine was 1 1/2 inches round) trace with the blue traceable pen two circles for every snowman you want to make. Carefully cut the circles out. You could also trace a shot or juice glass.

On the front circle you will make eyes and a mouth with black embroidery thread.


Next cut a tiny to orange triangle and sew it on with orange thread.


On the back piece of felt sew on the pin.


You can buy the pins at any craft or fabric store. At craft stores they are often in the bead section.


With white thread sew the front and back pieces together. Before sewing completely add a cotton ball. I stretch the cotton ball out a little so that it fills the entire circle.

I have been doing this in batches - I sew about 10 fronts then 10 backs and then sew together. When I am finished with all of them I will try to think of a fun packing idea.

Wednesday, January 21, 2015

He was a Fisherman of Men


I substitute teach elementary Religion classes. Today I taught 5th grade and the lesson was according to Mark - He was a Fisherman of Men. So I made some little treat bags for the kids.


Each cellophane bag had a package of Pepperidge Farm  Goldfish, a KitKat bar, Smarties and a Tootsie Pop.


Then I folded a piece of scrapbook paper and stapled it over the cellophane bag and added a label - "He was a Fisherman of Men" The kids really liked their treat.  I really like the 5th graders they are so smart and such good readers.

Wednesday, January 14, 2015

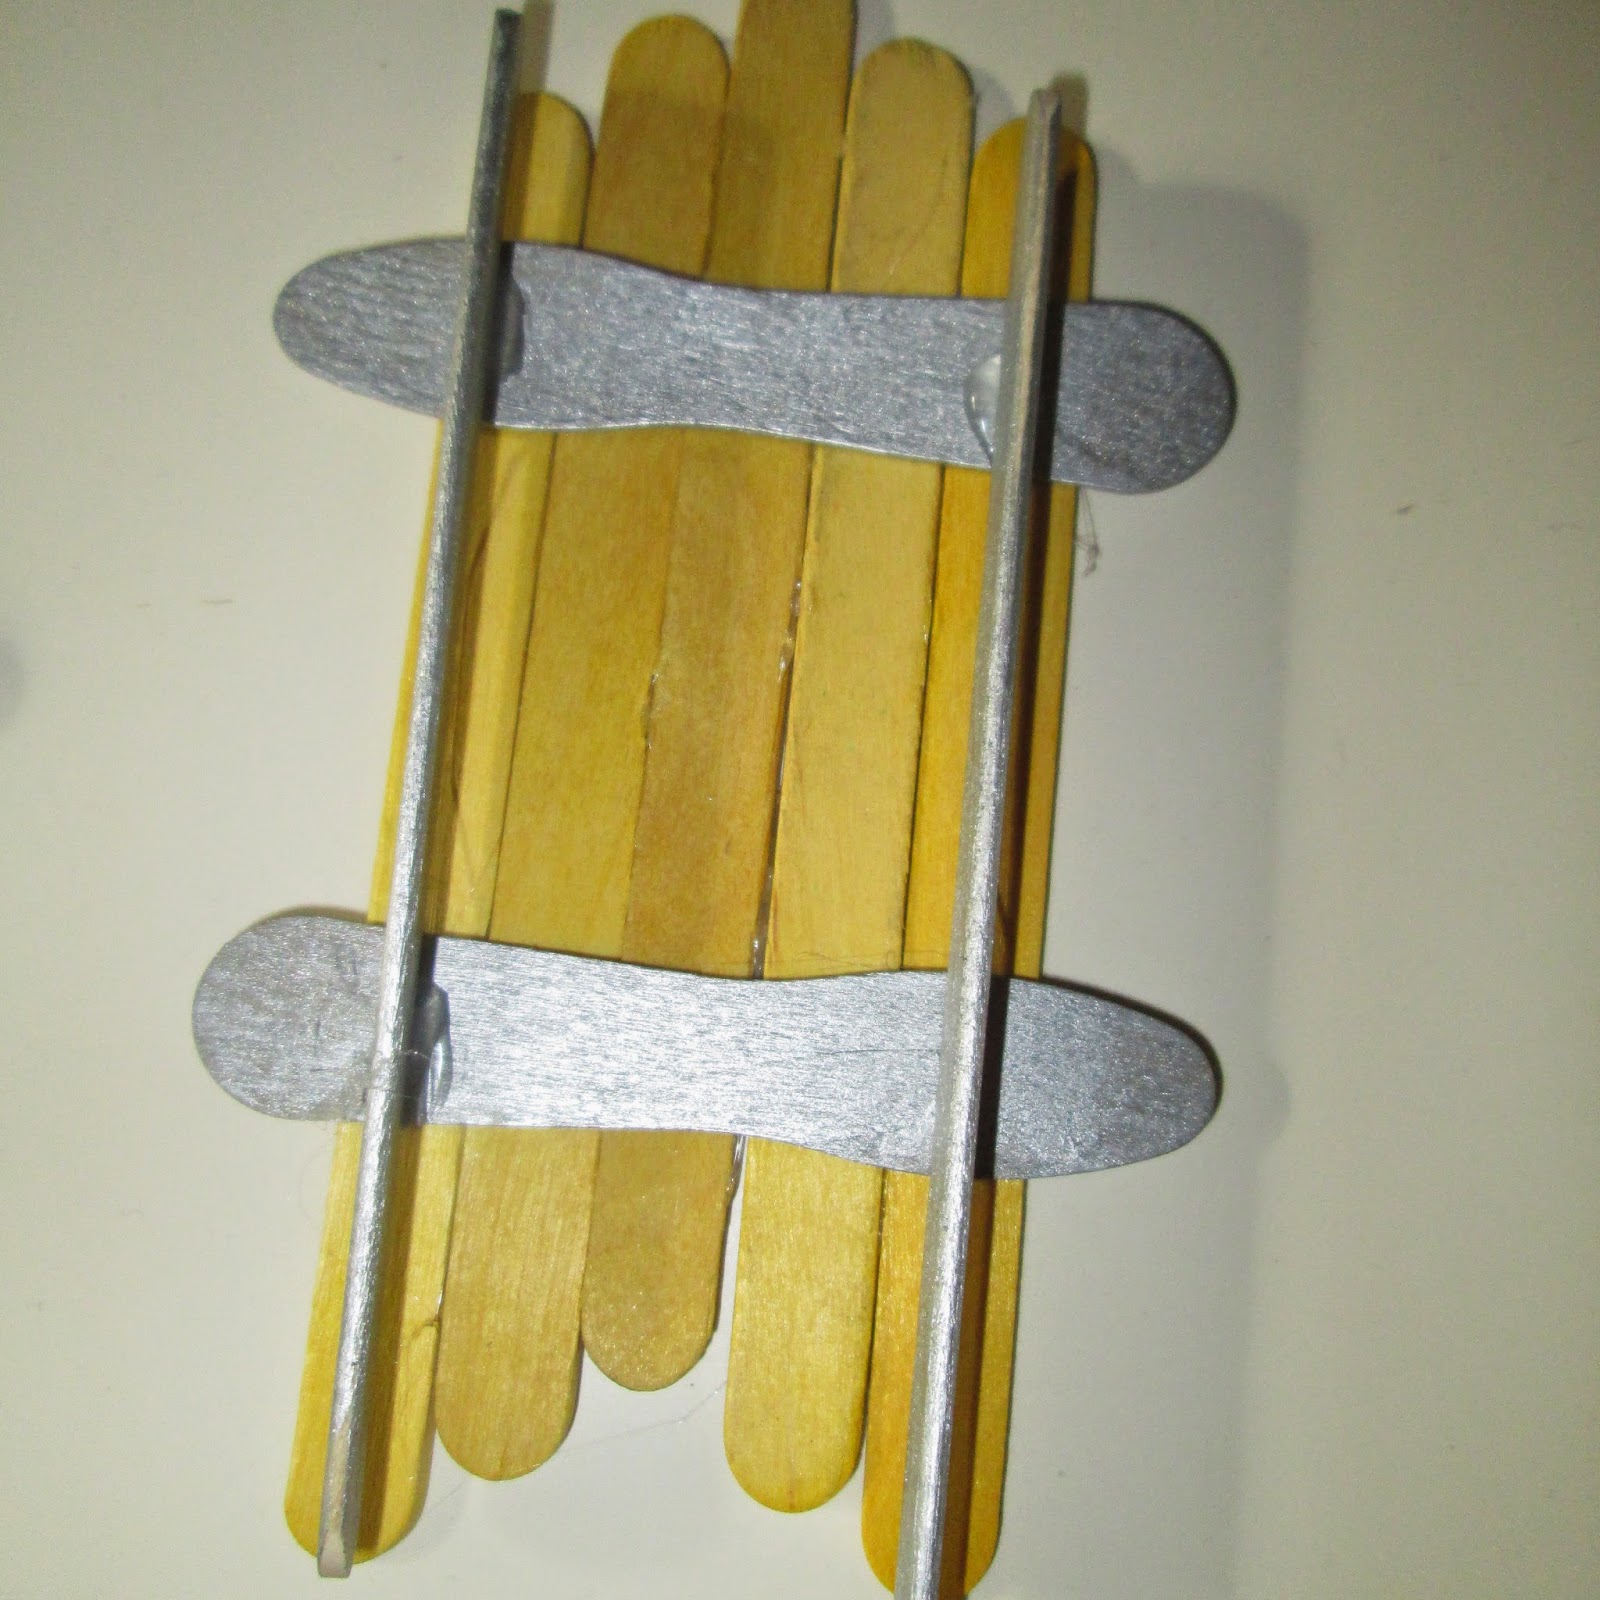
Popsicle Stick Sled Ornaments


I made 50 of these little sleds for Meals on Wheels. They can put them on a coffee table, mantle or end table as a little decoration. When I started making these the weather was rainy and really cold. Now we are experiencing warm weather.  January, go figure! They were really easy to make - just many steps!

These sleds would look adorable tied onto Christmas packages.

Supplies:

colored popsicle sticks

wooden popsicle sticks

half size wooden popsicle sticks

metallic silver paint

paint brush

glue gun, glue

silver cord, twine or ribbon

winter themed stickers

cellophane bags

Directions:

Buy the colored popsicle sticks - then you don't have to paint them!


 Layout the colored popsicle sticks in a sled pattern.


Use  a very small amount of hot glue between each popsicle stick. 


Paint the wooden popsicle sticks and half size popsicle sticks in the metallic silver paint on both sides.


Hot glue the half size silver painted sticks near the top and bottom of the sleigh. Then hot glue the blades on and let set.


The last step includes adding a coordinating sticker and glueing a piece of twine or cord to make a loop.


I made these sleds in every color and I was thinking how cute they will look on my tree next year. 


I was originally thinking about cutting some mitten shapes out of polka dot and striped scrapbook paper and Modge Podging the mittens to the sled. Maybe I will make the mittens when I make these again in December!


So I ended using some snowflake and snowman stickers to decorate the sleds.


I started lightly sanding some sleds to give them a distressed look.


I think the red sleds are my favorite. 


Even though Christmas is over I still enjoy making ornaments! I hope that the Meals on Wheels recipients enjoy these little sleds.

This would be a good project for classroom or craft group.


Monday, January 12, 2015

2015 Resolutions

I can't believe I forgot to post my 2015 Resolutions! I like to look back on them throughout the year and by posting them on my blog I somehow feel more accountable.


A bad habit I'm going to break:

Starting and not finishing projects

A destination I'd like to visit:

Napa and Sonoma

I'm going to work harder at:

Exercising everyday

A project I'd like to finish:

My screenplay

A class I'd like to take:

Cooking and baking classes

I'd like to spend more time:

Reading and writing

A food I want to eat more of:

Drink more water and eat lots of fresh fruit and veggies

I want to wear more:

Dresses - I need to break my jean habit


Thursday, January 8, 2015

Sweet Scrapbook Paper Doves


Yesterday I gave the lesson on the Baptism of the Lord and I made some little Doves for the kids in the class out of scrapbook paper.


Despite the fact that I do not scrapbook - I have a ton of scrapbook paper. I use the scrapbook paper to make gift tags and my tin can vases. 


When he had been baptized,  Jesus came up immediately from the water, and behold the heavens were opened to Him, and He saw the Spirit of God descending like a dove alighting upon Him.

                                                         Matthew 3:16


The class I substituted for yesterday was 5th grade - so they were really smart and we discussed the symbol of the Dove in the Bible and the they also knew that Doves were also a universal symbol of peace.


After I cut out the Doves, I glue sticked on the wing and added a rhinestone sticker for the eye.


Then I Modge Podged The Doves onto a thick piece of paper. Once the Modge Podge dried - I cut out the Doves.


Wednesday, January 7, 2015

Heart Lollipops Made with Candy Canes


Every so often I get called to substitute teach an afternoon Religion class. I almost always bring a little bribe for good behavior. Yesterday I bought some mini candy canes at Target. I bought the fruity primary colored candy canes and some red and white candy canes to use for Valentine's Day.


This box of 60 candy canes (which will make 30 lollipops) was on super sale at 70% off. So I think I paid sixty cents!

Supplies:

Box of mini candy canes

Parchment paper

Lollipop sticks

Small plastic bags

Coordinating ribbon

Directions:

Preheat your oven to 250 degrees. Lay a piece of parchment paper on top of a cookie sheet. Lay the candy canes in a heart formation with a lollipop stick.


Bake the candy cane lollipops for 3 to 5 minutes. Watch them carefully. Mine took 4 minutes. Take them out of the oven and squeeze the lollipop stick and top of heart - so that the stick is firmly in place.


It will take the lollipops a few minutes to set - then they can be packed into the little bags and tied with a ribbon. 

This would be a fun birthday party favor! I used to make the Valentine ones for the classroom and sports teams. I also like to pass them out to neighbors.

Get your mini candy canes on sale this week!