Wednesday, October 31, 2012

Sports Ticket Collage


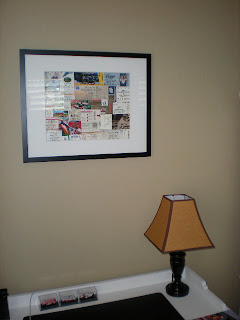
I made a sports ticket collage to hang in the new Man Cave.


I overlapped the tickets and I still had a ton of leftover tickets.


This is a close-up of the collage.


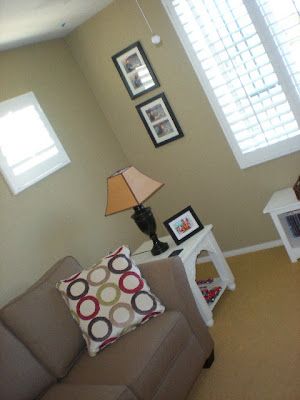
There are three windows in the playroom. I took photos at three different times of the day and these were the best pictures. Unfortunately I couldn't get rid of the bright light areas - ugh!


The collage hangs over the desk. I am going to put the TOC pin shadow box and make a shadow box of wristbands from a one of our favorite hotels.


Tuesday, October 30, 2012

Halloween Themed Gift Card Idea

Here is a gift card idea  use all the time! I save pieces of cardboard and wrap it with wrapping paper.


The party was Halloween themed. So I taped the Starbucks gift card on top and added a wrapped Hershey bar. I decorated the cardboard with some fun skull and bones ribbon. So simple and your gift card won't get lost.

Monday, October 29, 2012

New Playroom Decor or How the Playroom Became a Man Cave

When we moved into the house we currently live - my daughter was 10 and my son was 3. So the playroom was decorated for tween girls. My son played downstairs in the family room.

So now my daughter is away at college and my son is going to be thirteen in a few months. So I am finally going to redecorate the play room for teenage boys. It will no longer be a playroom - it will be a "Man Cave,"

Here are the before and after pictures of the playroom.


The white armoire houses the television, Play-station 3, Xbox and games and DVD's.


Next to the armoire is a desk.


Here is a close up of the desk.


This is a picture of the bench/bookcase under the window. The black thing in the left corner is a game chair.


The girl colored sofa! The walls are painted yellow.


Another view of the sofa.


Another view of the end table.


My husband repainted the room - he hasn't painted a room for 20 years. We have been using professional painters. He recently told me his painting days are over. What painting days? You painted two  rooms! The last room he painted was my daughters nursery- she is now 19!


I bought a new love seat, pillows, lamps, clock and reframed the pictures with black frames.


I took the blue striped pad off the bench. I added a basket on top for extra cords and game controllers. I also put all of his game balls in a big jar.


I wonder what happened to the corner of this photo?


The basketball and baseball trophies are now on top of the armoire.


The desk got a new lamp and desk blotter.


In looking back at the beginning pictures - this was the room that needed a makeover! Christian loves his new playroom! Oops! I meant he loves his new "Man Cave."

I still need to add a picture above his desk and perhaps a picture above the sofa. I still have a few projects that I am working on - like framing his TOC pins in a shadow box. And I am also thinking of making a collage with all of our sports tickets to hang in the "Cave."

I will try to post some pictures of the ticket collage and TOC pin shadow box. TOC is a baseball tournament - where the first place team in each city plays each other and they exchange city pins.


Sunday, October 28, 2012

Cake Balls - A Thank You For The Golf Fundraiser Team

Janine called me to help her make some cake balls - so she came over a few days ago and we made some cake balls!


Didn't these come out cute? I had the Thank You stickers in my craft box.  I hope the golf fundraiser ladies liked the thank you treats!

Saturday, October 27, 2012

Candy Corn Fudge


Yes, I love Candy Corn! I saw this recipe on Pinterest and of course I had to make it! The recipe came from somethingswanky,com and she has a lot of fun ideas - checkout her blog if you have a minute.

Ingredients:

6 cups of white chocolate  chips

2 cans sweetened condensed milk

Gel food coloring (yellow and orange)

Directions:

Line a 9 x 9 inch pan with parchment paper.

In a large saucepan combine the white chocolate chips and sweetened condensed milk and heat on medium/low. Stir so that the chocolate chips melt and your mixture is smooth.

Pour 1/3 of the mixture into the prepared pan and chill for 30 minutes in the refrigerator. Turn the heat off the remaining fudge.

After 1/2 hour - reheat your chocolate mixture. Pour another 1/3 of the mixture into a bowl and whisk in the orange gel food coloring. Pour over the white chilled layer.

Turn the heat off the remaining fudge. Put the pan back in the refrigerator for 1/2 hour.

The last step for the day is to reheat the last of the chocolate. Whisk in the yellow food coloring and pour over the chilled orange layer.

I let my fudge chill overnight.


Turn your fudge onto a cutting board.


 Using a sharp knife cut the fudge into 1/2 inch slices and then cut into diagonal slices.

You can cut them into large or small pieces. They would be really cute to decorate a cake or cupcakes.


This recipe made a ton of fudge! I packaged some up to bring to friends and neighbors.


I put some Candy Corn Fudge packages in my dining room. These would be super cute as classroom or sports team treats. They would be a fantastic Halloween party favor. They would be a cute addition to the Candy Corn Pajama party favor!

I love Candy Corn! What is your favorite candy?


Friday, October 26, 2012

Candy Corn Pajama Bottoms For the College Girls

I sent Noelle and six of her friends some Candy Corn Pajama Bottoms.


I am kind of obsessed with candy corn! And I wish I had bought myself a pair! They are so cute!


I rolled the pajamas and tied them with ribbon. They were on sale at Old Navy online for $5 each. But they were running a 30% off special - so I got them for a great deal!

I think the girls will really like these! They would also be a great Halloween or slumber party favor.


Tuesday, October 23, 2012

Leaf Shaped Tortilla Chips - Yes, It's Fall Y'all!


These are so easy and fun to make! Plus you just need a few simple ingredients.

Ingredients:

Corn tortillas
Canola oil
Sea salt
Table salt
Leaf shaped cookie cutter
Pastry brush

Directions:

Using your leaf cookie cutter - start cutting out leaf shapes with the corn tortillas.


My leaf cookie cutter is really large.


I can only cut two leafs from each tortilla.


Once you cut out all of your leaf tortillas. Place them in a single layer on a cookie sheet.


Brush each leaf with a little canola oil and sprinkle with sea salt and table salt. Bake at 400 degrees for about 8 minutes. If your cookie cutter is smaller you might want to bake at 350 degrees for 6 or 7 minutes.


The leaf tortillas should be a little golden. Place on a serving tray with a bowl of salsa or guacamole.


These are fun and easy to make! Your kids might want to help. And I like making these because they are baked instead of fried.


Monday, October 22, 2012

Ghost Cookies - Boo!


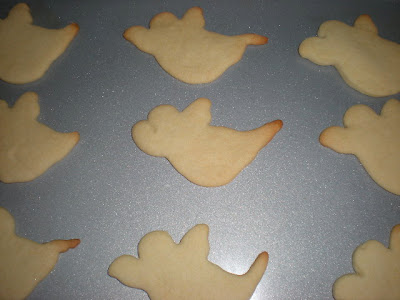
I made some Ghost Cookies - Boo! To you! This is my favorite sugar cookie recipe!

Ingredients:

3 1/2 cups all purpose flour

1/2 teaspoon salt

1 cup (2 sticks) butter, softened

2/3 cup sugar

1 egg

1 tablespoon light corn syrup

1 tablespoon vanilla

Directions:

In a medium bowl combine the flour and salt. Set aside.

In a large bowl cream butter and sugar until light and fluffy. Mix in egg, corn syrup and vanilla.

Add flour 1/3 at a time and mix throughly after each addition.  Divide dough in half and make two disks. Wrap each disk in plastic wrap and refrigerate for at least two hours.

Tic tock. It has been two hours. 

Preheat oven to 375 degrees.

Roll out dough between two lightly floured pieces of parchment paper. Cut out your ghost shapes.

Bake for 6 to 8 minutes. Cool cookies completely before you begin the decorating process.


I used this frosting recipe to decorate the ghosts. For the eyes I used mini chocolate chips.

Ingredients:

4 cups powdered sugar

1/3 cup butter melted

1 teaspoon vanilla

3 tablespoons milk

Directions:

Combine all of the above ingredients and whisk until everything is combined. If icing is a little runny add a few more tablespoons of powdered sugar. If the icing is too thick add another tablespoon of milk.

Put the icing in a zipper bag. Twist the bag so that the icing is at the bottom. Snip a little hole and pipe on the icing. While the icing is still a little wet add the mini chocolate chips for the eyes.


I like to decorate on my cookies on parchment paper. This icing usually takes about three hours to become completely dry.


I think my ghost cookies look a little friendly!

Friday, October 19, 2012

I am Going Batty! And I Made Bat Cookies!

First I would like to say using black icing drives me Batty! I was going to make some black cat cookies. But now I am leaning toward making pumpkin or ghost cookies the next time I make Halloween cookies.


Using my favorite sugar cookie recipe- I made some bat cookies. Then I tinted some royal icing with a ton of black gel icing.


My icing was a little runny. I tried to thicken it with a little more confectioner's sugar.


After the icing hardened a little I added two little sprinkles for the eyes. Do you see how my black icing turned out? I wanted to start over and make a new batch of icing - but I had used all of my black gel food coloring in this batch of frosting.

And that is why I went a little batty!


Monday, October 15, 2012

Candy Corn Balls


I made some Candy Corn Balls to hang from the dining room chandelier. Last year I made a huge candy corn garland to drape over the chandelier and it took me forever. This was a quick and easy project.

You will need:

Glass Christmas balls
Bags of candy corn
Coordinating ribbon


You can buy these glass balls at Michaels or Hobby Lobby in the Christmas section. They often go on sale or use a coupon. And they come in all different sizes.


I love the colors of candy corn! Then I used an orange and white polka dot ribbon that I already had in my craft box to hang the Candy Corn Balls.


This a close up picture of the candy corn ball and the ribbon hanger. This is a fun project to make with your kids.


Wednesday, October 10, 2012

Beware! Witch Warts - Toxic!


Beware. Today I packaged up some Toxic Witch Warts.  However, they are fat free and super sour.


Using a 50% off coupon I bought these cute little jars in the wedding section at Michaels. They were originally $19.00. So I bought them for only $10.


I also bought these skull and bones glitter stickers on sale  (40% off) - they were just  a dollar.


After I picked out my stickers - I found some matching ribbon also on a 40% sale. The ribbon came out to $2.39 a spool.


I was looking for a green candy - I couldn't find the right color of green candy. So I was thinking about filling them with black or red candy. Despite all of the Halloween candy every where I could not find what I was looking for! GRRR! Then I found these round little Lemonheads. I thought they could be rotten teeth or something sort of gross.


I put the skull glitter sticker on top of the jar. I made a little Witch Warts stickers on the computer and glued the skull ribbon around the bottom of the jar. Because skull and bones ribbon shouldn't be tied into a bow! Duh!


So to recap exactly what you need:

Little jars

Skull stickers

Skull ribbon

Little candies

Labels

Scissors

Hot glue


I think my Witch Warts came out really cute. They would be great party favors, classroom, team or neighbor treats.


I hope this post inspires you to make some gross little treats. Happy Halloween! And Bone Appetit!